Showing posts with label widget. Show all posts
Showing posts with label widget. Show all posts
Friday, October 28, 2016
How To Add Related Posts Widget For Blogger With Thumbnails
How To Add Related Posts Widget For Blogger With Thumbnails
Today topic is "How You Can Added Related Posts Widget For Blogger With Thumbnails". When you add this widget your blog looks beautiful. It helps your readers to go through the similar posts they were reading and so this widget helps to decrease your bounce rate by increasing blog page views.
 In this post we will go through the steps of adding the Related Posts Widget with thumbnails for Blogger. Ready to added it to your template? Go through the steps by steps below. Lets sarts.
How To Add Related Posts Widget For Blogger With Thumbnails
Now youve done all the proccess correct, congrat youve been added the related post widget successful into your blogger post.
Enjoy and dont forget to share this tutorial to your friends and other communities.
- How to Added Your blog Sitemap widget automatically
How To Add Related Posts Widget For Blogger With Thumbnails
- Firstly Go To Blogger Dashboard.
- Back up your existing Template before making any changes!
- Make sure to check the "Expand Widget Templates " box.
- Find </head> Using CTRL+F
- Copy the code below and paste it just after </head> tag.
<!--Related Posts with thumbnails Scripts and Styles Start --><b:if cond=data:blog.pageType == "item"><style type="text/css">#related- posts {float:center;text- transform:none;height:100 %;min-height:100% ;padding-top:5px;padding- left:5px;} #related-posts h2{font- size: 1.6em;font-weight: bold;color: black;font- family: Georgia, &# 8220;Times New Roman&# 8221;, Times, serif;margin- bottom: 0.75em;margin-top: 0em;padding-top: 0em;}# related-posts a{color:black;} #related-posts a:hover {color:black;} #related-posts a:hover {background-color:# d4eaf2;}</style><script type=text/javascript>var defaultnoimage=" http://1 . bp.blogspot.com/_ u4gySN2ZgqE/ SosvnavWq0I/ AAAAAAAAArk/ yL95WlyTqr0/s 400 / noimage.png";var maxresults=5;var splittercolor="#d4eaf2";var relatedpoststitle="Related Posts";</script><script src=http:// beautifulbloggerwidgets. googlecode.com/files/ related_posts_with_ thumbnails_min.js type=text/javascript/></ b:if><!--Related Posts with thumbnails Scripts and Styles End -->
- Now find the following code below:
<div class=post-body>
- If you cant find it, then search for this below one by using Ctrl+F.
<data:post.body/>
- Copy the code below and paste it just after <data:post.body/> tag and save your template.
<!-- Related Posts with Thumbnails Code Start --> <b:if cond=data:blog.pageType == "item"> <div id=related-posts> <b:loop values=data:post.labels var=label> <b:if cond=data:label.isLast != "true"> </b:if> <script expr_src="/ feeds/posts/default/-/ " + data:label.name + "?alt=json-in- script&callback=related _results_labels_ thumbs&max- results=6" type=text/ javascript/></b:loop> <script type=text/ javascript> removeRelatedDuplicates_ thumbs(); printRelatedLabels_ thumbs ("<data:post.url/ >"); </script> </div><div style=clear:both/> <!-- remove --></b:if> <b:if cond=data:blog.url == data:blog.homepageUrl>< b:if cond=data:post.isFirstPost> <a href=http:// beautifulbloggerwidgets. blogspot.com/ ><img style="border: 0" alt="Blogger Widgets" src=" http://2.bp.blogspot . com/-Hn8-zTJf3L0/ T9cqAcnrfJI/ AAAAAAAAAGM/5gBy5_ MPPBQ/s 1600 /blogger- widgets.png" /></a> </b:if></b:if> <!-- Related Posts with Thumbnails Code End -->Change the 6 value from max-results=6 with the number of posts you want to be displayed.
Now youve done all the proccess correct, congrat youve been added the related post widget successful into your blogger post.
Enjoy and dont forget to share this tutorial to your friends and other communities.
Go to link Download
Wednesday, September 21, 2016
How to Add Email Subscription Box Widget to Blogger with Social Media Icons
How to Add Email Subscription Box Widget to Blogger with Social Media Icons
Todays weve give you blogger tips about how to Add Email Subscription Box with some social media share bottom to your Blogger for getting more subscribers to your blog. You can get more traffic with Email subscription. We give you step by step guide on how to add email subscription box togethe with Facebook, Twitter, Pinterest and Rss Subscriber Icons.
This is very good looking and attractive widget for blogger to increase RSS subscribers with Facebook Fan Page, Twitter Account and Pinterest Icon.

Add Email Subscription Box to your Blogger


This is very good looking and attractive widget for blogger to increase RSS subscribers with Facebook Fan Page, Twitter Account and Pinterest Icon.
Add Email Subscription Box to your Blogger
We give you step by step guide to Add Email Subscription Box Widget to Blogger, Please follow below induction to add widget on your blog:
1. Now Login into Blogger Dashboard
2. Go to Layout and Click on Add Gadgets as shown in this below picture.
3. When you click on Add a Gadgets a new popup will be opened, and select HTML/JavaScript from list.
4. Copy and paste the below code:
<style> .NNBTsocial_box-email{ background:Fff no-repeat 0px 12px ; width:270px;float:center;font-size:1.4em;font-weight:bold;margin:2px 20px 0px 10px;color:#686B6C; } .NNBTsocial_box-emailsubmit{ background:#0084CE;cursor:pointer; color:#fff; border:none;padding:3px;margin:0 0 0px 0;text-shadow:0 -1px 1px rgbaundefined0,0,0,0.25); -moz-border-radius:2px; -webkit-border-radius:2px; border-radius:2px; font:12px sans-serif; } .NNBTsocial_box-emailsubmit:hover{ background:#E98313; } .textarea{ padding:2px; margin:0px 2px 0px 2px; background:#f9f9f9; border:1px solid #ccc; resize:none; box-shadow:inset 1px 1px 1px rgbaundefined0,0,0,0.1); -moz-box-shadow:inset 1px 1px 1px rgbaundefined0,0,0,0.1); -webkit-box-shadow:inset 1px 1px 1px rgbaundefined0,0,0,0.1); font-size:13px; width:200px; height:20px;color:#666;} #socialboxNBT { text-align:center;font-weight:bold;padding:5px;border:1px solid black;width:300px; -moz-box-shadow: 0px 0px 8px #000000;-webkit-box-shadow: 0px 0px 8px #000000;box-shadow: 0px 0px 8px #000000;} </style> <br /> <div id="socialboxNBT"> <a href="http://feeds.feedburner.com/kudantown" imageanchor="1" rel="nofollow" style="float: center; margin-left: .5em; margin-right: 1em;" target="blank"><img border="0" src="https://blogger.googleusercontent.com/img/b/R29vZ2xl/AVvXsEj_Cqk1bTk3III2PNGoGLlVp-8xTzjf5aznp5jHvTeaY059y4ZCkFOigrVfzZ8Kh9OhhbkeglsIKatRS0ob5py5kxoi2G9tSjIJX3Kl0mzpDN1oj7qLzJ8egqVfVF8oSy-KnT_L2ijEzO0/s1600/NNBT-rss.png" /></a> Submit your Email Address to Get Free latest Articles Directly to your Inbox <br /> <div class="NNBTsocial_box-email"> <form action="http://feedburner.google.com/fb/a/mailverify" id="feedform" method="post" onsubmit="window.openundefinedhttp://feedburner.google.com/fb/a/mailverify?uri=NBTLab, popupwindow, scrollbars=yes,width=550,height=520);return true" target="popupwindow"> <input class="textarea" gtbfieldid="3" name="email" onblur="if undefinedthis.value == "") {this.value = "Enter email address here";}" onfocus="if undefinedthis.value == "Enter email address here") {this.value = "";}" type="text" value="Enter email address here..." /> <input name="uri" type="hidden" value="haakblog" /><input name="loc" type="hidden" value="en_US" /> <input class="NNBTsocial_box-emailsubmit" type="submit" value="Submit" /> </form> </div> <style class="text/css"> table {border-bottom: 0px solid #E6E6E6;float: center;width: 300px;margin:-8px 0 0 0px;} .subicons {border-right: 0px solid #E6E6E6;} .Fadeout {filter:alphaundefinedopacity=100);opacity: 1.0;border:0; } .Fadeout:hover{filter:alphaundefinedopacity=80);opacity: 0.8;border:0; } </style> <br /><div class="table"><table> <tbody><tr> <td><div class="subicons"> <a class="Fadeout" href="http://www.facebook.com/symbiangurus" imageanchor="1" rel="nofollow" target="_blank"><img border="0" src="https://blogger.googleusercontent.com/img/b/R29vZ2xl/AVvXsEgaVqgRmbctR2AuCW1vrppd5FByMUfQxcvAEWJ6nfFgAgvX_1phBXjEzscKM0OiNEdnXy31E9FRhtBi-BB6-rhyjIQ9jIm65UlnCYPvFXsF1sjaNAnjbpu6Dmt9briC9ZKUUhKYXXRuyh0/s1600/NNBT-facebook-icon.png" /></a></div> </td><td><div class="subicons"> <a class="Fadeout" href="http://www.twitter.com/abubakarkudan" imageanchor="1" rel="nofollow" target="_blank"><img border="0" src="https://blogger.googleusercontent.com/img/b/R29vZ2xl/AVvXsEh3sfbC5sjAzPRn-Dzh3yXTsqULxfbE5LtC2YGcm6BNK_32BSMFcAkyLrL7-NooFy4IjP9Fd0nwXrwPtvDpRK8ux82hiE63Qvbxu5WBR0I2vcv03UIdz8N3WjnX2-NUa568tWhQY6rQ9yc/s1600/NNBT-twitter-icon.png" /></a></div> </td> <td><div class="subicons"> <a class="Fadeout" href="http://feeds.feedburner.com/kudantown" imageanchor="1" rel="nofollow" target="_blank"><img border="0" src="https://blogger.googleusercontent.com/img/b/R29vZ2xl/AVvXsEiyBW3w223Z0Gpt8mA9ZJb3H9gkCXrcxcTlM-X51po0gBInIjm0JHs2ebbTHEjNF3lQTmAzEzj8c3-q5YUXb18GbmTKy5V3IDPki4gZhf9pWL73fE2xmswUhGJFKhkQGSfGe-8L1gIQqtM/s1600/NNBT-rss-icon.png" /></a></div> </td> <td><a class="Fadeout" href="https://pinterest.com/kudantown" imageanchor="1" rel="nofollow" target="_blank"><img border="0" src="https://blogger.googleusercontent.com/img/b/R29vZ2xl/AVvXsEitQx3nz2mgd0XsbjwrHeY8o1SOrtlo3waxPMLgpA3oS6RzAAZBFIw7i7b2d-NCKsJg_4p1DAy7BHmyJE5NiSLgkA7R0hR7A-3BiTZCu74SDBmTGff6YCgQ98x4yTwRLZkfbWgqeDxj6mA/s1600/NNBT-Pinterest-icon.png" /></a></td> </tr></tbody></table></div></div>
<small>
<a href="http://www.haakblog.com" rel="dofollow" target="_blank" title="blogger"><img src="https://bitly.com/haakblog" alt="blogger" border="0" style="position: fixed; bottom: 10%; right: 0%;" /></a><a style=align:center; href=http://www.haakblog.com/2013/10/add-email-subscription-box-widget-blogger.html target=_blank>Get Widget</a></small>
<a href="http://www.haakblog.com" rel="dofollow" target="_blank" title="blogger"><img src="https://bitly.com/haakblog" alt="blogger" border="0" style="position: fixed; bottom: 10%; right: 0%;" /></a><a style=align:center; href=http://www.haakblog.com/2013/10/add-email-subscription-box-widget-blogger.html target=_blank>Get Widget</a></small>
5. After copy and paste the code follow and the below with your username.
- Change http://feeds.feedburner.com/kudantown to your Feed Burner username
- Change http://www.facebook.com/symbiangurus to your Facebook fans Page Name.
- Change http://www.twitter.com/abubakarkudan to your Twitter Username.
- Change https://pinterest.com/kudantown to your Pinterest Username.
Steps to change your username:
Then Click on save button and enjoy,dont forget to share this post to your friends.
Also Join our Facebook group for more.
Go to link Download
Saturday, September 17, 2016
How To Add Recent Posts Widget With Thumbnails On Blogger NairotechBlog
How To Add Recent Posts Widget With Thumbnails On Blogger NairotechBlog
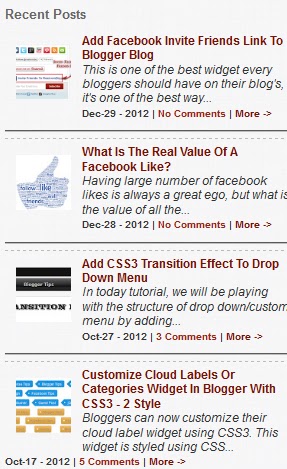
Recent posts widget is quite a lovely widget that can be used to beautify & add spice to your Blogger & Wordpress Site, these widget stands out from other Recent post widget because it shows the date in which the post was published, no. of comments and read more link.
Let get to the real deal for Today......
Steps To Install Recent Post Widget On Your Blog
- Navigate your blogger dashboard
- Click on Layout > Add a Gadget > HTML/JavaScript
- Copy and paste the following code in the content box.
< style type=text/css>
img.recent_thumb {padding:1px;width:55px;height:55px;border:0;
float:left;margin:10px;}
.recent_posts_with_thumbs {float: left;width: 100%;min-height: 70px;margin: 5px 0px 5px 0px;padding: 0;font-size:12px;}
ul.recent_posts_with_thumbs li {padding-bottom:5px;padding-top:5px;min-height:65px;}
.recent_posts_with_thumbs a {text-decoration:none;}
.recent_posts_with_thumbs strong {font-size:10px;}</style>
<script style=text/javascript src=http://www.webaholic.co.in/other/recent-posts-widget-with-images.js></script>
<script style=text/javascript>
var numposts = 6;
var showpostthumbnails = true;
var displaymore = true;
var displayseparator = true;
var showcommentnum = true;
var showpostdate = true;
var showpostsummary = true;
var numchars = 98;</script>
<script src=http://www.YOUR-BLOGGER-URL.blogspot.com/feeds/posts/default?orderby=published&alt=json-in-script&callback=showrecentpostswiththumbs></script>
You Are Done!
Please, Share this with friends and use our subscription links below.
Hope This Helps, Pals?
Go to link Download
Subscribe to:
Posts (Atom)