Showing posts with label zero. Show all posts
Showing posts with label zero. Show all posts
Monday, September 5, 2016
How to Root Infinix Zero 3 X552 and Install TWRP Recovery
How to Root Infinix Zero 3 X552 and Install TWRP Recovery
Infinix Zero 3 is the latest flagship device from Infinix Mobility, and comes with premium features and well-grounded specs. To mention a few, the device is endowned with a 20.7MP rear camera, 3GB RAM, Android 5.1 Lollipop operating system (out of the box), 2.2GHz Octa-core processor and 4G LTE capabilities.

Previously, I published a guide on how to change the IMEI of Infinix Zero 3 X552, and I know that most of you’ve already tweaked your IMEI to enjoy some certain features. Today, I’m happy to inform you guys that the TWRP recovery file for Infinix Zero 3 has been ported by Team Hovatek, and root is now possible via recovery mode.
In this guide, I would brief you guys on how to install TWRP Recovery on Infinix Zero 3 X552 using SP flash tools and then rooting follows.
Requirements:
- - SP Flash tools (Download)
- - VCOM drivers (Read installation guide)
- - Recovery Image (Download)
- - USB cable for communicating the device with your PC.
How to Install TWRP Recovery on Infinix Zero 3 X552
Step 1: First download the recovery zip file from here, and then extract the “Recovery.img” and “MT6795_Android_Scatter.txt” file to the desktop screen of your computer or create a folder and extract to it, as seen in the image below.

Step 2: Now, power off your device, and remove the battery if possible.
Step 3: Next, download the SP Flash tool, and extract the files to your computer. You should get the following files as seen below, after extraction.

Step 5: Once the flash tool is launched, then click on the download/upgrade tab and click on scatter loading button
Step 6: Now, locate the “MT6795_Android_Scatter.txt” file, which is on your desktop.

Step 8: Immediately, connect your device (without battery if possible) to your computer via USB cable, and press Volume Down or up key, so it would be detected easily by your computer.
Step 9: The Flashing process would be in progress, and a Green button would appear once the process is completed.
That’s it. TWRP Recovery is now installed on your Infinix Zero 3 X552, to boot to recovery mode, simply press and hold Volume Down button + press Power button.
Step 2: Now, switch off your device and boot to recovery mode (press and hold Volume Down button + press Power button).
Step 3: After that, go to the recover main menu, and then choose install, and then select the SuperSU Zip file and flash immediately.
Step 4: Once the installation process is completed, simply go back main recovery menu and tap on Reboot system, and your device would be rebooted.

That’s it. Your Infinix Zero 3 X552 would be rooted successfully. To verify root access, simply download root checker and confirm if your device has gained root access.
Step 2: Now, power off your device, and remove the battery if possible.
Step 3: Next, download the SP Flash tool, and extract the files to your computer. You should get the following files as seen below, after extraction.
Step 4: From the extracted files, open Flash_tool.exe
Step 5: Once the flash tool is launched, then click on the download/upgrade tab and click on scatter loading button
Step 6: Now, locate the “MT6795_Android_Scatter.txt” file, which is on your desktop.
Step 7: After that, click download to begin flashing process.
Step 8: Immediately, connect your device (without battery if possible) to your computer via USB cable, and press Volume Down or up key, so it would be detected easily by your computer.
Step 9: The Flashing process would be in progress, and a Green button would appear once the process is completed.
That’s it. TWRP Recovery is now installed on your Infinix Zero 3 X552, to boot to recovery mode, simply press and hold Volume Down button + press Power button.
How to Root Infinix Zero 3 X552
Step 1: Firstly, download the SuperSU file from here, and move the downloaded files to the internal storage of your Infinix Zero 3 X552 devices.
Step 2: Now, switch off your device and boot to recovery mode (press and hold Volume Down button + press Power button).
Step 3: After that, go to the recover main menu, and then choose install, and then select the SuperSU Zip file and flash immediately.
Step 4: Once the installation process is completed, simply go back main recovery menu and tap on Reboot system, and your device would be rebooted.
That’s it. Your Infinix Zero 3 X552 would be rooted successfully. To verify root access, simply download root checker and confirm if your device has gained root access.
Credits: Team Hovatek
Go to link Download
Tuesday, August 30, 2016
How To Root Infinix Zero X506 In Less Than 5 mins With Root Genius
How To Root Infinix Zero X506 In Less Than 5 mins With Root Genius
Hi dear reader, Want to know how you can root your infinix zero x506 ? Fellow my simple steps and in less than 5 mins your inifinix X506 should be rooted...
Requirements??
A Windows PC/Laptop
An Inifinix Zero X506
Battery % at 100%
Lets Begin...
Root Genius is One click root tool designed to work on Windows Computer. It helps user to root their Android Smartphone in a single click. Here, i am going to guide you through on how to use Root Genius to root the latest infinix zero x506.
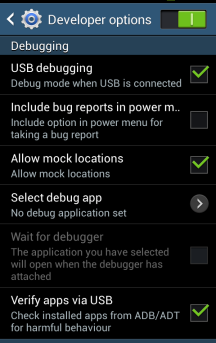
Step 1: Enable USB Debuggin on your Android Smartphone. To enable USB debugging, openSettings>> Developers option>>> USB Debugging >> Tick to Enable
Tip: for Android 4.2.2 or above, to show this option Go to Settings>> About Phone >>Built Number (Tap on it for 5-8 times).
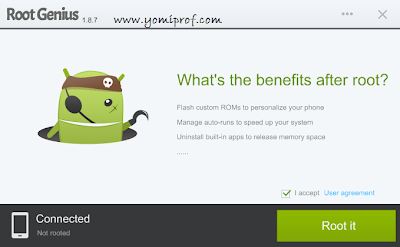
Step 2: Download Root Genius Application on your PC here and open it
Step 3: connect your Android device to the computer (with USB Debugging enabled).
--Once your Infinix zero is connected successfully to the computer, Root Genius will automatically detect your Device.
Step 4: Click on the “Root It” button to begin the rooting process
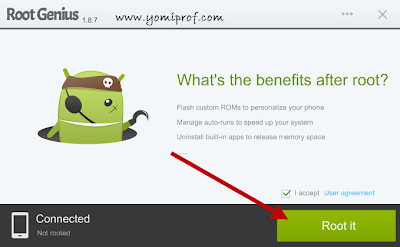
-- Root Genius will automatically “Root” your Android Device and also install the KingUser Application On your device
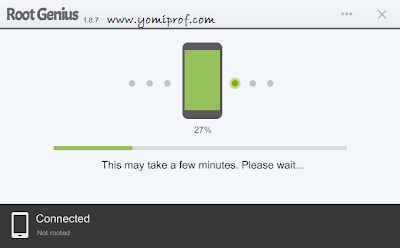
Step 5: Your Infinix Zero X506 is rooted. :0 ;)
To check if your Infinix Zero is rooted correctly, open any app that requires root access if the app works flawlessly, it means your device has been successfully rooted.
Alternatively, you can head over to Google play store and download RootChecker app to verify root access.
Photo Credits to: YomiProf
DISCLAIMER:
i shall not be held responsible for what ever that may happen during your root process...
If you have anything to say or ask, Kindly make use of the comment form below. If you also want me to post a short review of your company or product, on this blog, do not hesitate to contact me.
Please, do not forget to SUBSCRIBE to this blog, so that you can be receiving future articles, freebies DIRECTLY into your email inbox, even when you are not online.
CLICK HERE TO SUBSCRIBE NOW!
Cheers!
Go to link Download
Subscribe to:
Posts (Atom)