Showing posts with label nokia. Show all posts
Showing posts with label nokia. Show all posts
Monday, November 28, 2016
hot news Rubah NOKIA MAP JADI OFFLINE
hot news Rubah NOKIA MAP JADI OFFLINE

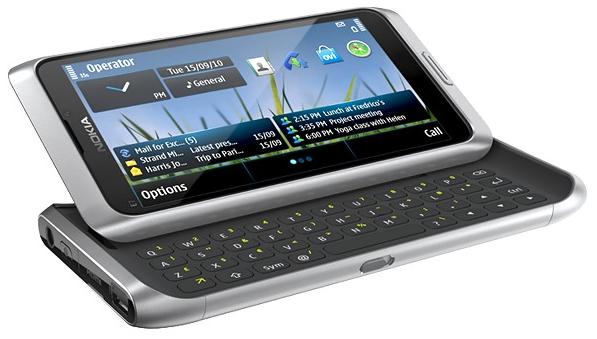
Bagi pemakai HP Nokia ber-Symbian S60v3
mungkin pernah memakai Nokia Map,
terutama yang Nokia nya sudah ber-GPS.
Nah, saat menggunakan Nokia Map pasti
si HP langsung minta online – kaya Saykoji hehe – untuk mengupdate petanya, tapi bagi yang tidak punya
koneksi internet unlimited pasti bakalan
teriak2 karena tiba2 bisa terjadi pulsa
berkurang atau tagihan melonjak akibat
traffic buat update peta tersebut.
Supaya Nokia Map nggak terus2an update peta, maka donlot aja peta Nokia
tersebut untuk region dimana kita
perlukan. Cara pertama bisa pake Nokia Map
Loader yang jalan via Nokia PC Suite, tapi
tentu saja cuma bisa pilih satu region
saja untuk satu waktu, karena file peta-
nya gak disimpen di PC dan gak bisa di-
copy untuk Nokia yang lain. Cara kedua dengan download peta dari
Nokia tanpa Nokia Map Loader, tapi
harus tahu dulu Nokia Map yang ada di
HP versi berapa, karena saat ini ada 2
versi peta Nokia yaitu Ovi Maps 3.0 dan
Nokia Maps 2.0. Cara untuk bisa tau versi peta yg di butuhkan bisa dilihat di sini Karena saya pakai Nokia 6120 Classic
maka peta yang saya butuhkan adalah
Nokia Maps 2.0.
1. Jalankan Nokia Maps pada ponsel Anda
, lau exit lagi
2. Download petanya di sana
3. Unzip/extrack file yang
telah di download, maka akan ada banyak sekali folder, pindahkan semua folder tersebut ke direktori E:/cites/DISKCHACHE
4. Setelah itu restart hape kalian, lalu buka nokia map kembali..
Gampang kan coy...
Go to link Download
How to Root Nokia X and Nokia Nokia X XL
How to Root Nokia X and Nokia Nokia X XL
Nokia X and Nokia Nokia X + XL officially revealed at MWC 2014 in February end and now Nokia X already available for pre-order in a number of countries, such as China and Malaysia. Interestingly, all three Nokia phones are sold at affordable prices but unfortunately runs on Android 4.1 version of the Android Open Source Project (AOSP) without access to Google Play Store.
 As for the interface of the Nokia X is a combination of the three OS (Windows Phone, Android and Asha) that might be called the Nokia UI 1.0. Therefore, using the open source version of Android, Nokia X could have several different launcher installed. Besides Nokia X can also root, which can open a custom ROM and a number of Google applications.
If you want to root Nokia X, Nokia or Nokia X + XL, then you can follow the following steps:
1. Download Framaroot.apk on Nokia X Nokia Nokia X + or XL.
2. Use the built-in Astro file manager and browse the folder where you downloaded Framaroot.apk, then tap the icon to install.
3. Currently there are two options do the install root "Aragorn" and "Gandalf", you need to do is select the "Gandalf" by tapping it.
4. If youve installed selasai do, the last thing you do is reboot the Nokia X, X + or Nokia Nokia XL. After the Nokia X, X + or Nokia Nokia XL already root. If the above steps are still not clear, then you can see how to root the Nokia X via the video below.
Go to link Download
Tuesday, November 22, 2016
How To Download Whatsapp Messenger On Nokia Asha 200
How To Download Whatsapp Messenger On Nokia Asha 200
Now some of the Nokia Java phones like Nokia Asha 200 , Asha 205 , C1, C2, X2’s- 1-2-5 and others Nokia Asha models are not compatible with Whatsapp Messenger. The Nokia Asha Dual Sim variants are not always compatible with Whatsapp. If you go to Whatsapp website and you are welcome with “Sorry, your device is not supported at the moment. Make sure you are using a web browser on your phone to view this page”, that simply means your mobile phone is not supported.

To use Whatsapp on your unsupported Nokia phones, you have to follow any of the methods I dropped below.
Before we start the 2nd method, you must have at least 3mb free memory space on your phone/ memory card. At least 5mb of data and N10 must be on your phone to cater for the downloading of the application, updating it and text message to confirm your phone number during installation. Once you have avail your self with these minimum requirements, you can now proceed to the procedures listed below.
1. First and foremost, you need to download these two files: Whatsapp_Asha_200.jar and Download_Whatsapp_Nokia_Asha_200.jad
2. After downloading the two files on your phone, you will only see the Whatsapp.jar. Don’t open this file
3. Click on option, scroll down and select Update Version.
4. After a successful update, open the application and supply your details in the required column and then click continue. If you follow any of the methods outlined above, by now WhatsApp should be running on your Asha 200 , Asha 205 and others unsupported Nokia phones.
Then if you have a problem you can leave your comment here or Add me via my number : +2348067611897 on your whatsapp contact.
Enjoy and share this post to your friends.
Go to link Download
Sunday, November 20, 2016
How to root Nokia X and get access to Play Store and Google Now
How to root Nokia X and get access to Play Store and Google Now

(Also see: Nokia X Dual SIM review)
The Nokia X is based on the Android Open Source Project (AOSP), and is powered by Microsoft and Nokia services. Nokia has used the AOSP version corresponding to Android 4.1 Jelly Bean as the baseline for its operating system. The highlight of the Nokia X is the highly customised version of Android, with Metro-inspired UI and access to Nokias own app store. While theres no access to Googles Play Store, Nokia is offering side-loading of Android apps from any third-party source: 1mobile market, SlideME market, Aptoide, and Yandex Store.
However, it is possible to install the Google Play store on the Nokia X through rooting. This means giving the user root permission on the phone. By rooting a device you can run apps that require access to certain system settings, and the ability to flash custom ROMs to the phone, which can actually add extra features. Before starting, note that unlocking the bootloader or rooting process voids the warranty of your device. And more importantly, the rooting process might brick the device if you make any mistakes, so be careful when following these steps.
Method 1-
Rooting the Nokia X:
In order to run Google apps, you will be required to root your Nokia X with the following steps-

-Users will be required to enable USB debugging on the Nokia X that can be found in Settings Developer option. You will have to tick the USB debugging box to successfully perform the rooting process.
To start, you will have to enable USB debugging. To do this, first go to your phones Settings > Developer and tick the USB debugging box.
-Next users have to download the Farmaroot.apk to the Nokia X or to a Windows PC (transfer it to the Nokia X). Use the automatic setup to install the root tool on the Nokia X phone.
To start, go to the Farmaroot.apk folder in your Nokia X > Click the .APK file and it will start the automatic installation of the app on to the phone, follow the instructions.
(If a file is transferred from PC to the Nokia X, users can search for the required file on the phone via the ASTRO File Manager, which comes pre-installed on the device.)

Once, the Farmaroot has installed on your Nokia X, choose the app icon in app drawer to install SuperSU. To install, open the SuperSU file and choose the Gandalf exploit, which is a dropdown option in the Farmaroot app.
When the installation is complete, there will be a success pop-up message on the screen. Now you just need to reboot your Nokia X for successful completion of the rooting process.
- The Farmaroot app on the Nokia X also gives an option to unroot the device, if you want to bring it back to normal.
Installing the Google Play store on the Nokia X:
-Download the Google services APKs from here on your Nokia X or a Windows PC and copy the APKs to the phone using a USB cable.
To start, go to this link install the Google services APKs to your phone or Windows PC. Transfer all the Google APKs to Nokia X using a USB cable.
-Now, you will be required to extract all the Google APKs. To do this, first download a root explorer app on your Nokia X, which is a file manager for root users.

Go to the folder where you saved the Google APKs and select all the files; next from the menu choose the option Extract all. The extracted APK files will be automatically stored on to microSD cards SpeedSoftware folder. At this stage, do not install the APKs.
-The extracted files then must be moved on to /system/apps folder of the Nokia X. (Use the root explorer app, and go to the SpeedSoftware folder on the microSD card. Select the files, and from the menu, choose Cut. Then, go to the /system/apps/ folder, and choose Paste from the menu.)
-Next, you will have to change the permission of all the extracted files in the /system/apps folder by selecting all the files that were extracted (Google APKs) and opening the Permission option in the menu for the all the apps. The Owner, Group and Other options should have Read Only checked in the popup that comes when you press Permission. Only Owner should have the Write option checked. Reboot your Nokia X once the permission has been changed for all the extracted Google APK files to make the device more stable.

-Now you will find the Google app icons for Hangouts, Gmail, and Google Play Store among others in the app drawer.
Enjoy, you have successfully installed the Google Play store and other Google services on your Nokia X. Now sign-in to your Google account to access Google services on your Nokia X and you can explore your favourite Android apps directly from the Play Store.
This method works with the earlier version of the Nokia X software, but once you move to version 11.1.1, new security features dont permit this technique. Theres a new method that can help if youve updated your phone though.
Method 2-
In case the above method does not work because of new security restrictions, heres what you can do:
-Install the Nokia composite ADB interface on your Windows PC, in addition to installing the Framaroot.apk on your Nokia X (following the steps detailed above).

The Nokia composite ADB interface folder installed on your PC should have two sub folders for KingoRoot_NokiaX_Mod and Nokia X USB drivers.
-Plug your Nokia X to the Windows PC with a USB cable, open the device manager and right click on the connected device. This gives the Update Driver option on your Windows PC, to install the ADB drivers.
You might be prompted to enter new drivers for your Nokia X, which can be found the Nokia composite ADB interface folder - Nokia X USB drivers. Just choose browse, go to the folder and select the driver.
-Now you need to open the KingoRoot.exe file on your Windows PC, which can be found in the Nokia composite ADB interface folder. Please note that you need to keep your Nokia X connected to the Windows PC during the complete process.

-Once you have started the KingoRoot app on the PC, it will appear on your Windows PC screen giving you an option to root the connected device. When the phone is not rooted, KingoRoot on the PC shows the status of the connected device as Not Rooted.
-Now users need to choose the Root button in the KingoRoot app on your PC to root the device. This will also install the SuperSU app on the connected Nokia X device automatically. This will take few minutes.
-Reboot the phone after the connected device (Nokia X) status in KingoRoot app shows Rooted on your PC. After the reboot, open the SuperSU app on the Nokia X, this will for the ask grant option on the app. Press grant and move ahead.
-After pressing grant, open KingoRoot on your PC again. This time the KingoRoot shows two options - Root again or Remove Root. To return your phone to normal, you can click on Remove Root.
-Now you can repeat the method of installing the Google Play store on the Nokia X (check Method 1) by extracting all the Google APKs using the root explorer.
Go to link Download
Wednesday, November 16, 2016
How to Service Nokia Phones with Nokia Infinity Box Service Software
How to Service Nokia Phones with Nokia Infinity Box Service Software
In the world of Technology, as we built machine and tools; there comes problems and solutions at the same time. For a number of years; users have been of common pitfalls for which they are not able to solve and the problems is to service and repair their mobile phones. Examples of this task are flashing and unlocking. One of the vital elements we lack in possession of ourselves is the tool to carry out these operations. Other tools and software repair we had previously and up til now didnt perform up to our expectations. Infinity Box in my side is the best service software.
The Nokia Best (bb5 easy service tool) also called Infinity Best Box is a Nokia Service Software Tool that enable a user to manage, repair and service his/her Nokia Phones. The software application can be operated by with users with physical, semi-skilled or mental skills. Nokia s40 series and Symbian OS mobile devices are compatible with Infinity Box Setup features. List of Nokia Service Softwares are Nokia Service Software Professional (NSS Pro), JAF + OGM + Pkey Emulator, Nemesis Service Suite, Nokia Care, Phoenix Service Software, but Infinity box appears to offer the best support. It is regarded in some areas as the Best Box Dongle. Infinity Best Tool Downloadand Ftd2xx File
Infinity Software Best can be installed in a computer with a minimum RAM of 480 megabytes (mb) and at least 256 gig of hard disk space. Functions of Infinity Tool
.bmp "How to Service Nokia Phones with Infinity Best Box Service Software")
.bmp "How to Service Nokia Phones with Infinity Best Box Service Software")
.bmp "How to Service Nokia Phones with Infinity Best Box Service Software")
The Nokia Best (bb5 easy service tool) also called Infinity Best Box is a Nokia Service Software Tool that enable a user to manage, repair and service his/her Nokia Phones. The software application can be operated by with users with physical, semi-skilled or mental skills. Nokia s40 series and Symbian OS mobile devices are compatible with Infinity Box Setup features. List of Nokia Service Softwares are Nokia Service Software Professional (NSS Pro), JAF + OGM + Pkey Emulator, Nemesis Service Suite, Nokia Care, Phoenix Service Software, but Infinity box appears to offer the best support. It is regarded in some areas as the Best Box Dongle. Infinity Best Tool Downloadand Ftd2xx File
The following will be a list of useful guide on How to effectively use Infinity Best
Notice: One can make use of this software effectively without Nokia PC or Ovi Suite installed on the computer. With the availability of Nokia Connectivity Cable Driver on the computer; Tasks can be run easily
Characteristics of Infinity Best Dongle
- Infinity box setup could easily installed in a computer
- The Service Suite has a user and family friendly interface.
- Tasks can be accomplished with simple instructions
- Users with little or no technical know-how can easily get used to the functions of the software
- Nokia bb5 Best tool supports wide range of Operating Systems such as Windows Vista/XP/7/8
- Infinity Tool is built along Windows drivers which save of lots of time and bandwidth.
- Infinity USB Phoenix has a lot of useful features which makes service and repair.
- Service Tool
- Access to phone data such as model, manufactured and repaired date, serial number.
- Read and Reset User security code also known as security keyguard
- Life Timer Reset
- Full PM with different ranges e.g. Skip 120/308, Wr. Only 1/309
- Setting Phone to Local, Test, and Normal Mode
- Factory Reset such as Full factory, SW Upgrade definition, Production Tune, User data
- Product Profile Read and Edit
- User Data Tool
- Phone book Backup
- Read, Write, SMS Recovery and Restore
- Gallery backup
- Memory Card Password Reader
- Source device e.g. s60v3, Symbian s60, s40
- Misc
- Camera test and configuration
- Sim lock restore
- LCD Test Pattern
- Serial Number Change
- Server Support
- Flashing
- Dead mobile phone flash
- Manual flash
- Full Flash
- Safe Flash
- Dead-Test
- Cold Flash
- PPM Flash only
- Repair
- RPL Flash with Read and Write function
- Low Format
- Super Dongle Read
- Certificate and PM authentication
- Local SX4 authentication
- Unlock
- SL1, SL2, SL3 Unlock
- Infineon Server Unlock
- NCK Level Job
- DCT3 and DCT4 unlock Job
- Ntab Model Mobile phone Devices
- Maego and Meego Check and Reboot options
- Custom flash settings : - Nolo, Kernel, eMMC, Cmt root
- WP Service
- Self Test and Modem flash
Tutorials
- How to read, write and recover your Micro SD Card Password with Infinity Box
- How to unlock and recover your phone locked security code with Infinity Box Flashing Software
- How to flash your dead mobile phone using dead phone USB flashing with Infinity Box
- How to Multitask and Minimize two or more application with Infinity Setup
How to connect your phone with Infinity Box Service Software
- Open Infinity Best
- Use a USB data cable to connect your Nokia phone to the computer and select Ovi or PC Suite as default connection mode in your handset screen when a prompt comes up. A small window will pop-up up telling you your device has been found and the phone and computer have been paired.
How to Read and Recover MMC Password
- Launch Infinity Box
- Click on the User Data Tool tab
.bmp "How to Service Nokia Phones with Infinity Best Box Service Software")
How to Flash and Reset Nokia Phones
- Navigate and click Flashing tab. You have to sure you have all the necessary firmware flash files ready for the task. To get a firmware files for your own Nokia mobile phone; visit Mr Crab Start selecting the firmware files one by one. Usually, the most essential flash file is the mcusw (also known as cnt or fpsx) which contain the phone settings and program source code, image, and the ppm file which also contain files like Games, Collections, Images, Music files, Video clips, and tones.
- The next step is to decide whether to perform a dead USB flashing or a factory reset settings by marking the options and click Flash. Notice: Make sure your phone battery is fully charged before performing the operation
- The types of phone and infinity USB flash are full flash, PPM flash, Dead Test, Manual, and Safe Flash.
.bmp "How to Service Nokia Phones with Infinity Best Box Service Software")
How to Unlock your Nokia Phone Security Code
- Navigate to the Unlock/Repair Tab.
- In the USB mode, choose the PC suite as default.
- Click on the Service Tool and User code tab to read the phone security code, usually the process of finishing the task is 10 seconds; your password code will appear and try to jot it down quickly.
- You can also the check the Phone Camera configuration status to check to see whether it is malfunctioned. Usually if your camera is spoilt, when trying to take pictures; the screen becomes black, the phone brick or even freezes; you can also check the SIM lock status of your cellular.
How to Backup your Phone Data
- Scroll to User Data Tool Tab
- Click Read Phone book and also click save gallery to save your phone data.
- To check your backup; Inside the same Infinity Setup Folder; you will find a folder named Backup
.bmp "How to Service Nokia Phones with Infinity Best Box Service Software")
Common Pitfall and Solution of Inifnity Best
- Range check Error: - The only way to solve this problem is to purchase the box at any electronic shops. For me, this is the best Nokia Service Software
How to Multitask and Minimize two or more applications with Infinity Setup
Go to link Download
Tuesday, November 15, 2016
How to Hack Your Nokia s60v3 Symbian phone E51 E63 E71
How to Hack Your Nokia s60v3 Symbian phone E51 E63 E71
As we all know that every nokia phone has a strong security. So we could not use or install those applications or softwares which are not certified or not trusted applications.
That is why users have to face this kind of problem when they have try to install them. Many times we see certificate error, certificate expired, not installed etc.
I saw that many people used to change there phones date and time to install expired applications. It is annoyed and difficult. But we can ignore this certificate system by a simple way.

Its very simple and i have personally tried it in a several nokia phones and it works very well. After hacking your phones certificate system you can easily install any kind of unsign applications and games without any problem.
MUST READ:
Dont afraid of this, there is no any risk involve in this process. It is easy and you can also unhack your phone as usual. Now i will show you that how to hack your nokia phone.
Just follow this instructions below :
1. Firstly Download Nokia E63 s60v3 hacking tools by Kudantown.zip into your mobile phone.
2. Now install "NortonSymbianHackLDD" in your phone.
3. Then open "NortonSymbianHackLDD".
4. Go to Options.
5. Select Antivirus.
6. Select Quarantine List.

7. In the Quarantine section you will see 3 files now go to Options.
8. Select Resotre all.
9. Select Yes.

10. Install "RomPatcher+" in your phone.
11. Then open the "RomPatcher +".
12. Go to Options.
13. Now select All Patches.
14. Then click on Apply and also click on Add to auto.

NOTE : If you see all files become blue that means your hacking its complete. Also if you see the installserver display a red sign like you see in this image that is on top.
15. Download your suitable "install server".
16. Then install X-plore in your phone.
17. Then open the"Xplore"
18. Goto the folder that you keep the hacking tools and copy or move the installserver.
19. Copy or move the installserver.
20. Paste it into "C/Sys/Bin" folder Like you see in this below image.

21. You will see the red icons does not changed but dont mind youve successful hack your E51,E63 and E71.
22. Then enjoy Finally your Problem was solved! Congratulations! Now you youve successful hack your nokia E63 symbian phone!
If there is any problem, just dont worry you can contact us.
Join our Facebook group for more info.
That is why users have to face this kind of problem when they have try to install them. Many times we see certificate error, certificate expired, not installed etc.
I saw that many people used to change there phones date and time to install expired applications. It is annoyed and difficult. But we can ignore this certificate system by a simple way.
Its very simple and i have personally tried it in a several nokia phones and it works very well. After hacking your phones certificate system you can easily install any kind of unsign applications and games without any problem.
MUST READ:
- Learn How to Hacked Any Nokia symbian Phone s60v3 & s60v5 symbian Anna and symbian belle
- FORMAT/ HARD RESET ON BOOT UP TUTORIAL IN NOKIA SYMBIAN PHONE INCLUDES N8-00 AND NOKIA N97
- How to Recieve Files/Application Directly to C or E on Nokia Symbian Phone s60v3 and s60v5
- How to Master Reset your Nokia N8,C7,E7 Symbian belle to their Default Factory Settings
Dont afraid of this, there is no any risk involve in this process. It is easy and you can also unhack your phone as usual. Now i will show you that how to hack your nokia phone.
Just follow this instructions below :
1. Firstly Download Nokia E63 s60v3 hacking tools by Kudantown.zip into your mobile phone.
2. Now install "NortonSymbianHackLDD" in your phone.
3. Then open "NortonSymbianHackLDD".
4. Go to Options.
5. Select Antivirus.
6. Select Quarantine List.
7. In the Quarantine section you will see 3 files now go to Options.
8. Select Resotre all.
9. Select Yes.
10. Install "RomPatcher+" in your phone.
11. Then open the "RomPatcher +".
12. Go to Options.
13. Now select All Patches.
14. Then click on Apply and also click on Add to auto.
NOTE : If you see all files become blue that means your hacking its complete. Also if you see the installserver display a red sign like you see in this image that is on top.
15. Download your suitable "install server".
16. Then install X-plore in your phone.
17. Then open the"Xplore"
18. Goto the folder that you keep the hacking tools and copy or move the installserver.
19. Copy or move the installserver.
20. Paste it into "C/Sys/Bin" folder Like you see in this below image.
21. You will see the red icons does not changed but dont mind youve successful hack your E51,E63 and E71.
22. Then enjoy Finally your Problem was solved! Congratulations! Now you youve successful hack your nokia E63 symbian phone!
If there is any problem, just dont worry you can contact us.
Join our Facebook group for more info.
Go to link Download
Monday, November 14, 2016
How To Flash Nokia Asha 201 Using Phoenix Software via USB Data Cable
How To Flash Nokia Asha 201 Using Phoenix Software via USB Data Cable
How You can Flash Your Nokia Asha 201 Using Phoenix Software via USB Data Cable

You Must Read This Carefully : How To flash your Nokia Phone Using Phoenix Service Software via Nokia USB Cable
Must Download : Download Nokia Asha 201 Latest Flashing File
Enjoy...
Go to link Download
Monday, November 7, 2016
How to Flash and Upgrade Your Dead Nokia Phones With Phoenix Service Software Through Usb Cable
How to Flash and Upgrade Your Dead Nokia Phones With Phoenix Service Software Through Usb Cable
As we all know that some of the Nokia mobile phone both Nokia s40 java phone and also with Nokia s60 Symbian phone get some little problems, the some of this problem is viruses attack.
This Tutorial will take you through how you can format your Nokia Phones be it Symbian or java with Phoenix service software using your original Nokia USB Data cable.
Flashing Nokia PHONES may affect your language depending on the firmware you downloaded e.g if your default firmware is Europe English and you download that of Asia, you may see changes in Language change- or product code change.
NOTE : Be prepared to do this at your own risk but dont worry nothing will be happen youll get success. However nobody will follow this tutorial and have any problem.The reason is this topic has been tested and it is trusted i have flashed my Nokia N97 and Nokia E6 together with Nokia-2700c severally with phoenix service software without any problem.

Some Tools Require you need Download before you begin:
Download Navifirm from here
Size : 674KB
Download Phoenix Service Software Here
Size : 153MB
NOTE : Also if you dont have the flash files of the phone that you want flash on your computer you must download the RM from this link below : Download All Nokia Flashing Files HERE


This Tutorial will take you through how you can format your Nokia Phones be it Symbian or java with Phoenix service software using your original Nokia USB Data cable.
Flashing Nokia PHONES may affect your language depending on the firmware you downloaded e.g if your default firmware is Europe English and you download that of Asia, you may see changes in Language change- or product code change.
NOTE : Be prepared to do this at your own risk but dont worry nothing will be happen youll get success. However nobody will follow this tutorial and have any problem.The reason is this topic has been tested and it is trusted i have flashed my Nokia N97 and Nokia E6 together with Nokia-2700c severally with phoenix service software without any problem.
Some Tools Require you need Download before you begin:
Download Navifirm from here
Size : 674KB
Download Phoenix Service Software Here
Size : 153MB
NOTE : Also if you dont have the flash files of the phone that you want flash on your computer you must download the RM from this link below : Download All Nokia Flashing Files HERE
After downloading all the required tools above you can now read on to complete the following process in other to flash your dead Nokia phone.
Now The Procedures will Start now :
1. First remove the cable from the phone and make sure it is turned off. If it is necessary, remove and insert the battery of the phone you want flash.
1. First remove the cable from the phone and make sure it is turned off. If it is necessary, remove and insert the battery of the phone you want flash.
2. Run Phoenix Service Software as administrator. (Windows Vista, 7: right click -> run as administrator; XP: login with administrator privileges). Select “NO CONNECTION” as your connection type
3. Then Select “Open Product” option in “File” menu look at the picture below.
4. A window will pop-up, select the mobile phone that you want to flash. Then product code of the mobile phone is on the sticker under the battery. (Usually RM-xxx)
5. Now Select “Firmware Update” option in “Flashing” menu.
6. Press “…” button on the top-right corner of the window to select the language pack / product code You want to flash on phone.
7. Now select the product code / language pack You want to flash on phone, and press OK button see the screenshot below.
8. Tick Dead phone USB flashing like you see in the below image.
9. Then scroll down and click on “Update Software” to start the firmware update procedure.
10. Follow the instructions: (if that method doesn’t work, press OK, then press power on button on phone and right after connect the usb cable)
11. Phone firmware update process should start immediatly.
12. When the update process finished, a window will appear: “Firmware updating succeded.”
13. You Can now remove your phone from cable, and try to turn it on. It may happen that the phone doesn’t turn on. Hardware error, firmware downgrade or bad certificate could cause that problem.
Also If you encountered any problem in the course of your flashing the phone, please drop your comment here and we should help you for solving the problem.
Special Thanks to LemmyMobile Where I get this experiency.
You can also Join our Facebook Group Discussion for more latest info.
Go to link Download
Tuesday, October 11, 2016
How To Flash Your Nokia Phone Using USB
How To Flash Your Nokia Phone Using USB
In this post, Ill be explaining how to flash your Nokia phone or update the firmware using just a usb cable without any flashing box like JAF, Cyclone and the rest of them. All that is needed is a usb cord, two softwares and an internet connection.
A lot of people often hear about "flashing mobile phones" without knowing what it actually means. Flashing a phone means re-installing the phones firmware files, that is, re-installing the operating system of the phone. When a phones operating system files are corrupt due to incompatible applications, virus attack and so on, flashing might be the only solution when restoring factory settings doesnt work. Apart from this, flashing a phone too can be used to update the firmware to a newer version, install a cracked firmware, "wake" a dead phone, etc.
I have to emphasize that flashing a phone shouldnt be done just for fun as it might be useful and dangerous at the same time. Yes, flashing a phone can wake a dead phone, so also flashing a working phone can kill it!
ALSO NOTE THAT THESE SOFTWARES
To flash your phone through usb, you need these:
i. Navifirm - to download the phones firmware
ii. Phoenix Service Suite
iii. Nokia PC Suite
iv. A good USB cable
1. Install Phoenix. This might take a pretty long time if youre using a slow computer but youve got to be patient
2. Run Navifirm but be sure to have a working internet connection before doing this. It connects to the internet and loads all available Nokia phones firmwares. This too also takes a long time and requires a steady internet connection so you need some patience here too.
3. Be sure your phones battery is charged to at least 50% though flashing should take less than 10 minutes.
4. Select your phone type under Products. It is located on the phone just beneath the battery. For example, N97s product type is RM-505, RM-133 for N73 and RM-596 for Nokia N8. (You can as well check it by dialling *#0000# in standby.)
5. Wait till it loads Releases. From here, you can see all available firmware versions. Select the latest you find there.
6. It now loads Variants, select your desired product code from the list. You can also check beneath the battery to find the original product code.
7. Now select all the files and download. Select Download with IDMM (Internet Download Manager) if you have it installed it on your PC. If not, select, Download with program and choose the destination folder.
8. Go to C:/Program Files/Nokia/Phoenix/Products
Create a folder with the name as your phone product type.
For example, for Nokia N97, the folder will be named RM-505
The firmware files you downloaded will then be located in C:/Program Files/Nokia/Phoenix/Products/RM-505
9. Now run PHOENIX and connect your mobile phone in PC Suite mode. If phoenix detects your phone automatically, skip steps 110-14.
10. In Phoenix, click File > Manage Connections > New.
11. Now select the type of cable you are using. If you are using DKE-2, CA-53, Micro USB cable, select USB.
12. Click Next. It will find your product and say FOUND. If it doesn’t find any, you can try changing your cable type by clicking Back.
13. Click Next and then Finish.
14. Now your cable type (USB) appears in the connection list. Select it. Click APPLY and then CLOSE.
15. Now select File > Open Product.
16. A list of RM codes will open. Select your phone’s RM code.
17. Now select File > Scan Product.
18. Your phone’s firmware info will appear at the extreme bottom of the Phoenix Service Software window.
19. Now select Flashing > Firmware Update. At this point, Phoenix will automatically load the firmware files we talked about in step 8. If it doesnt, make sure you named that directory accordingly and please go over step 8 again.
20. If everything up to step 20 goes well, select “Refurbish”, wait until the “Successful” dialog box appear (DO NOT touch or disconnect the phone or USB cable during the process). Press OK, phone will disconnect and restart.
At the end Phoenix will tell you to disconnect your phone as the flashing has finished butome phones may not boot up automatically after the flashing has finished. In those cases, remove the battery and then insert it and manually start the phone.
FLASHING A DEAD PHONE WITH PHOENIX
The procedure is almost same as above but with litle differences.
1. Start Phoenix. Connect your phone through USB Cable (we are flashing a dead phone so the phone is off)
2. Click File > Open Product. Select your RM code from the window that appears. Click OK.
3. Click File > Manage Connections. Select No Connection. Then APPLY and CLOSE.
4. Now select Flashing > Firmware Update.
5. Check the option “Dead Phone USB Flashing”.
6. Click Refurbish and the flashing process is started.
7. After some time, flashing will pause asking you to turn on your phone.
8. Press the POWER button of your phone until the backlight comes up.
9. Flashing will proceed. Your phone will automatically start when the flashing finishes. When done, you can safely remove your data cable from handset.
Go to link Download
Thursday, October 6, 2016
HOW TO KNOW A FAKE NOKIA PHONE
HOW TO KNOW A FAKE NOKIA PHONE
In time like this, everything original is going fake without any physical difference from the original and mostly are from electronic market...well despite the fact that they dont want us to enjoy the original product by going to order for a lesser quality; we will ever insist for the best..............
This is are what you will have to do in order to know if you are really buying the original Nokia or you are just bargaining for another fake Nokia Phone:

This is are what you will have to do in order to know if you are really buying the original Nokia or you are just bargaining for another fake Nokia Phone:
- Type the code *#0000#, the Nokia phone displays some info about itself. If it is a new Nokia phone remember to put the battery and turn it on first
- Look for any number in the format dd-mm-yyyy. If you cannot find any number of that format, then suspect the Nokia phone to be a fake.
- Press the following on your mobile *#06# and the-international mobile equipment identity number appears (IMEI). Check the 7th and 8th numbers
IF the digit number Seven & Eight is 02 or 20 that mean it was assembled in the Emirates which is very Bad quality
IF the digit number Seven & Eight is 08 or 80 that means it was manufactured in Germany which is not bad
IF the digit number Seven & Eight is 01 or 10 that mean its manufactured in Finland which is Good
IF the digit number Seven & Eight is 00 that means it was manufactured in original factory which is the best Mobile Quality ...
IF the digit number Seven & Eight is 13 that means it was assembled in
Azerbaijan which is very poor quality and potentially very dangerous to your health!!!
Go to link Download
Friday, September 30, 2016
How To Root And Get Access To Google Play Store On Nokia X2 Dual Sim RM 1013
How To Root And Get Access To Google Play Store On Nokia X2 Dual Sim RM 1013

I got Rooted for my Nokia X2 and successfully install the supersu. Everything is attached below. Cheers!
- Download & sideload the towelroot apk
- Run it and tap on "make it rain" to root
- Download & sideload the Supersu
- Run it > continue > Normal and reboot your device
CONGRATS! Now Your X2 is successfully rooted. Next Is To Get Google Play Store N Services
Step to install Play Store:
- Download and extract This File
- Copy the folder to your device / sdcard
- Install any Root Explorer app, we only need to use this to copy files
- Go to copied folder, copy all the files
- Go to /system/app and paste them there
- Reboot your device
- Enjoy!
OR U Can Use The Below App To Install Drivers,Root And Install Google Play>>>>
Download HERE
Go to link Download
Monday, September 19, 2016
How to Fix Nokia Lumia unboot after hard reset or update
How to Fix Nokia Lumia unboot after hard reset or update
Many users need to apply a hard reset our devices, But they have detected some problems with this process and some devices do not get past the first step showing gears constantly turning. Then I discussed a method to try to recover the nokia lumia device.
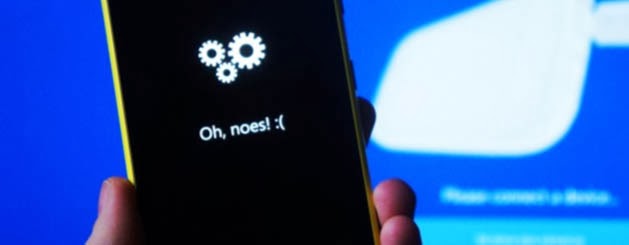
The good news is that, before taking the Nokia device to what will try to recover, you can now attempt a first terminal recovery at home, and try to fix it yourself.
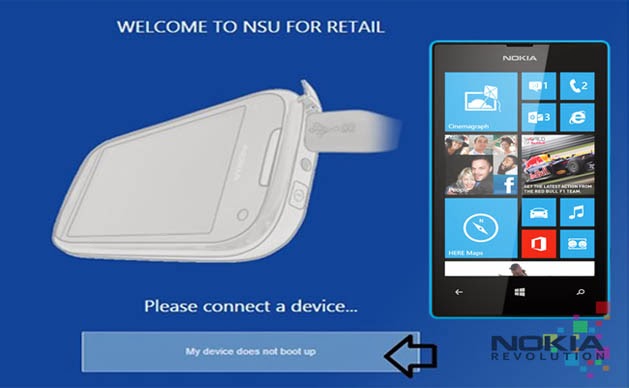
we see a button that tells us: "my device does not boot" . Its what we choose to enter will use in the next step wizard.
We hope the tutorial will serve as a support and allows you to recover those devices that are giving you headaches after the hard reset.
The good news is that, before taking the Nokia device to what will try to recover, you can now attempt a first terminal recovery at home, and try to fix it yourself.
Step 1: Install Nokia Software Updater for Retail
The first step is to download the software from Nokia that lets you install the firmware on our phone. If you had already, just open it and tell you that there is an update.Step 2: Connect the phone to your computer
The next step is simply to connect the phone to the computer with the USB cable. Of course, the device will light if it was not, but will not be recognized by any application (you may receive a message that a USB device is not recognized.) We start the Nokia Software Update for Retail application and see the image indicates that we connect the phone.we see a button that tells us: "my device does not boot" . Its what we choose to enter will use in the next step wizard.
Step 3: software reset
In this step, you click Continue, the program tries to find the phone, and then you apply a soft reset . To do this, we pressed the buttons on and volume down until we noticed a vibration. When the phone starts to boot you again, you should see that is recognized by the program.Step 4: Installing the firmware
In this step, download the firmware needed Nokia server, and then proceed with the installation if necessary. By installing a complete firmware, is how to perform a clean installation of the software on the terminal, so if there is no hardware problem should be solved and recover your phone. The process is the same as mentioned for upgrade to Lumia Amber .We hope the tutorial will serve as a support and allows you to recover those devices that are giving you headaches after the hard reset.
Go to link Download
Sunday, September 18, 2016
How To Format Hard Reset Nokia X X and Nokia XL Android Phone
How To Format Hard Reset Nokia X X and Nokia XL Android Phone
How To Remove Pattern Lock From Nokia X android, Hard Reset Nokia X Android Hard Reset Solution If You Forgot Your Screen Lock Combination Or Password.
 Follow These Simple Steps
Warning! All Data that is on your phone Will Be Lost.
- Press Together Volume Up + Power Button.
- Release Your Fingers Of The Phone When Nokia Logo Appear And Keep Pressing Volume Up.
- Choose With Volume Buutons "wipe Data/factory Reset" And Select It With Power Button of the phone.
- Choose "yes" With Volume Buttons And Select It With Power Button
- Wait Untiil Format Is Complete. Check the below image practically.

Then Select "reboot" Now youve Done. Enjoy and invite your friends.
Go to link Download
Saturday, September 17, 2016
How To Root Nokia X X and XL Android In Just 5 Minutes
How To Root Nokia X X and XL Android In Just 5 Minutes
Since the Nokia team announce the release of its first Android Smartphone ever Named Nokia X, X+ and XL and now finally you can now easily rooted this Nokia X series in just 4 simple steps within 5 minutes.

If you are interested for rooting your Nokia X model, just follow this simple steps below. This procedure is likely to void the phones warranty, so have this in mind when you fire up the root application on your first Nokia with Android operating system.

If you are interested for rooting your Nokia X model, just follow this simple steps below. This procedure is likely to void the phones warranty, so have this in mind when you fire up the root application on your first Nokia with Android operating system.
- New Download New Whatsapp+ For Android users
- Download Framaroot.apk
- Now Install it (you can use the built-in Astro file manager Download here, to locate where is downloaded) & Open
- Between “Aragorn” and “Grandalf” Click on Grandalf.
- Now Reboot your device. Its just as easy as that, after your phone has been rebooted, Your Nokia device has been rooted successful.
Go to link Download
Monday, September 5, 2016
How to Install Whatsapp on s40 Java Phones Like Nokia X3 00 and X2 00
How to Install Whatsapp on s40 Java Phones Like Nokia X3 00 and X2 00
This tutorial will guide you to install Whatsapp messenger on your non-supported java phones like the Nokia X3-00,X2-00 and any other non-supported java phones.

Please take note you need to free up your internal memory before proceeding, at least have more than 4MB free and very important to have two SIM card in the phone while installing it and setting it up so you dont have setting up favorites failed.
1. Download the Raw file from here note the file is a zipped file.
2. unzip the downloaded zipped file, then copy the whole folder to your memory card (advisable to do this step on a computer).
3. Now goto the folder, DO NOT launch the whatsapp application inside the folder just yet.
4. Copy the application from the memory card to your My Apps or Games.
5. Now go back to the initial folder and delete it.
6. Now go to the whatsapp application in your phone, click the option button and click update version, let it update then you can open the application…follow all instructions and be patient, when it is finally opening, you will get updating notification enabler let it load, it will fail and tell you phone not supported, close it and your whatsapp is installed and working.
Update: for those asking how to get the unzipped version download this two files here and here , copy them to a folder on your memory card, then rename them like this WhatsApp_jar will now be WhatsApp.jar then WhatsApp_jad will be WhatsApp.jar after this follow the steps from 4. above.
For People still not able to install Whatsapp both the zipped and unzipped, i still have a solution for you just download directly from Nokia store here and it will surely work,
You can now watch the video tutorial i made on Youtube, click the above video and watch the part 1 and 2.
A suggestion for people in india who are getting error on updating favorites should follow this steps:
Step 1 : You need to get a Nokia phone that has whatsapp messenger working on it already.
Step 2: Copy the application to the phone’s memory card (Note:copy not cut)
Step 3 : Remove the memory card and insert into your mobile phone copy the whatsapp to your phone.
Step 3 : Remove the memory card and insert into your mobile phone copy the whatsapp to your phone.
Now start enjoying whatsapp on your Nokia Nokia X3-00 and X2-00 thanks to Ashmin for pointing out the method
also if you are getting Setting up favorites failed. Network Conditions do not allow contact refresh then just delete your all configurations of gprs from Menu->Settings->Configuration->delete configurations…then again open your whatsapp application from memory card
some brilliant suggestions by our readers which could help you:
1. If you are getting error do a factory reset on your Nokia Nokia X3-00 and X2-00…then open your browser and update the new Nokia xpress. close and start the whole process again.
2. make sure you have two SIM CARDS in the phone while doing this process, but you will be needing just one to access the internet but the second SIM card slot should NOT be empty.
Go to link Download
Subscribe to:
Posts (Atom)