Wednesday, August 31, 2016

How to Restore an Unresponsive iPhone iPad

How to Restore an Unresponsive iPhone iPad


Due to heavy data like plenty of apps apps running or due to any other reason your device iPhone / iPad not respond. It hangs out and go into steady condition. This condition may irritates you. So, having little knowledge about the usage of iPhone or iPad you move to turn off device or restart it. Turn off or restart or wait till respons is not solution of your problem. You need to restore your device, So question is How to Restore an Unresponsive iPhone / iPad ?After reading this article you may able to convert your device in responsive mode from unresponsive mode. So follow given below steps to restore your iPhone.


How to Restore an Unresponsive iPhone / iPad


a. Turn Off the Unresponsive iPhone / iPad
1. Hold down the power button and home button at the same time


2. Blck screen will show then Apple logo will appear. Hold down both power button and home button continuously.

3. When screen become black and stay for a bit then leave the home and power button. iPhone / iPad now turn off.

 b. Turn On the Unresponsive iPhone / iPad


1. To turn on the iPhone / iPad, hold down home as well as power button.

2. If home screen appear then device is turn on. If device jammed at Apple logo , repeat  Section (a) to turn it back off and then follow step (c).

c. Put the iPhone / iPad into DFU Mode
1. When your device is in off mode, connect it with computer via USB.

2. Hold down Power and the Home button at the same time Apple logo will show then screen turns to black.

3. Leave the Power button but continue to hold the Home button until iTunes pops up a dialog box saying it has find an iPhone in recovery mode.

d. Flash the Stock Firmware and Your Latest Backup


1. Open iTunes, click on Restore.

2. When the device has been restarts , select the backup of the device when urged to restore your apps, contacts, etc.
 
3. Thats all. You have done.

See Also:iPhone 5S current model leaked

Go to link Download

Read more »

How To Find Facebook Profile Page ID

How To Find Facebook Profile Page ID


When creating a Facebook account, the system automatically assigns the user an identification number, known as the Facebook ID. Facebook allows the user replace their ID with username. If you are using a custom username for your Facebook profile or page, then unique profile ID will not appear.


Many tutorials give you an instruction by clicking right mouse on image profile to find your unique ID. Now I will tell you even easier to find your Facebook profile ID.


How To Find Facebook Profile/Page ID?

Just type at your address bar: https://graph.facebook.com/YOUR USERNAME or PAGE


Or type your username below and hint Get Facebook ID


Hope that helps.

Go to link Download

Read more »

HOW TO INCREASE YOUR MEMORY CARD FLASH DRIVE SPACE TO 4GB

HOW TO INCREASE YOUR MEMORY CARD FLASH DRIVE SPACE TO 4GB


Now, You can Convert all you Small Size Storage Device e.g Memory Card, Flash Drive of any Size to 4GB for Free without any Hidden Using a Simple Application.

HOW CAN I CONVERT MY SMALL SIZE MEMORY CARD & FLASH DRIVE TO 4GB? Just Follow the Below Steps accordingly & I bet you will enjoy this Tutorial to the Fullest and Can even make yourself Cool Money!
1. Download the Driver Increaser Software for your PC HERE , Open the Zip File using Winzip and Press Ctrl + All to Highlight all the Files at Once, then click on Extract and Choose your desire directly, Just choose Desktop.
2. Now after Unzipping, Now Insert your Memory Card to your PC using Card Reader or Plug in your Flash to your USB Port.
3. Open the Driver Increaser Folder and Locate the File "Drive Increaser 2", Just Double click on it to Run it.

4. Leave it Open, Then Go to My Computer >> Right Click on your Memory Card or Flash Drive >> Properties >> Give it or change the Existing Name to a Short Name and Ok it.
5. Now, Go back to the Driver Increaser Software and Type the Name you Give to your Memory Card or Flash Drive, Press Enter.
6. Now, You will be Ask to Put the Drive Letter, Go back to your My Computer, You should see it like this (G:) or (H:) or anything, If its (G:), Just Type G in the Software and Press Enter, It will ask you to Enter it Again, Do just that and Press Enter Again.
7. If it shows some texts in red color it has worked, But if it didnt show just Retry again >> Your Memory Card or Flash Drive should be 3.99GB now.
Thats All.
NOTE:- This software can convert any size of a storage device to 4GB, if you mistakenly changed an 8GB to 4GB, You can undo it by going to My Computer >> Right click on the drive, and Format it, this is the reverse of this tutorial. Do you Like it? Please Click on the Like Tutorial.

ThanX to koresma26 from naijaloaded

Go to link Download

Read more »

How to install meta tag on blogger

How to install meta tag on blogger


To install Meta tags on blogger is easy enough. 

Just follow the steps below :

Login to your Blogger.
Click Desain / layout.
Click Edit HTML 
then place the meta tag under the code below

<title> <data:blog.pageTitle/> </ title>


and dont forget to change the red code below in accordance with the description of your blog.


<meta content= your description here name=description/>

<Meta content = KEYWORD1, KEYWORD2, keyword3 ... name = keywords />
<meta content=INDEX, FOLLOW name=ROBOTS/> 


note : 
change the red code in the code above with your blog descripsition , and your keywods.
for more information about meta tag, please visit google webmaster or click here

 Related link
 what is meta tag

Go to link Download

Read more »

How To Add Two or More BBM applications on Android

How To Add Two or More BBM applications on Android


BBM for Android is a familiar thing. Already many blackberry users are switching to use android , because the BBM can be used in android.

This time we will share how to be able to use 2 or more BBM accounts in android phone. So first android phone can have two or more BBM pin.

Heres how you can do if you want to add BBM in android phone.
1. On your phone already installed default applications that BBM the mark with BBM icon.
2. Search in google, use keywords BBM2 for android.
3. Once found, download and install the application.
4. Once successfully installed, there will be 2 BBM icon on your android menu.

CAT: to add BBM again, please insert your keywords in google BBM3, BBM4, BBM5, download and install on your phone Andoroid. It will make your android phone has a 5 BBM (5 PIN).

Below is the view from my android, where there are two BBM applications already installed.
How To Add Two or More BBM applications on Android

Go to link Download

Read more »

HOW TO CREATE A DESKTOP SHORTCUT TO SAFELY REMOVE ALL USB REMOVEABLE DEVICE

HOW TO CREATE A DESKTOP SHORTCUT TO SAFELY REMOVE ALL USB REMOVEABLE DEVICE


Most time when we Insert any Removable Device through the USB Port of our PC, it is adviceable to Remove it using the System Tools or Option on the Taskbar before Removing it from the USB Port, Most people dont see this Step as something important or they Forget to do so, thats why most USB Device get Corrupts.

You can create shortcut to safely remove hardware device on you Desktop which is more visible and can be easily used to remove the hardware devices plugged to your PC.


HOW TO CREATE A DESKTOP SHORTCUT TO SAFELY REMOVE PLUGGED IN HARDWARES
1. Right click on your Desktop and Click on New.
2. Now click on Shortcut option from the list.
3. In the browse location just Paste in the below code and click on Next button.
4. Now it will ask you to Name the shortcut. Name it something like Safety Remove USB and then click on the Finish button
5. There should be a shortcut icon on your Desktop just double click on it and your external media will be Removed Safely.

Go to link Download

Read more »

How Apples Touch ID Fingerprint Sensor Was Circumvented Video

How Apples Touch ID Fingerprint Sensor Was Circumvented Video


Starbug of the Chaos Computer Club has posted a video that demonstrates how he was able to bypass Apples Touch ID fingerprint sensor using a fake finger.

It "was way easier than expected," Starbug told ArsTechnica in an e-mail. "I thought it would take at least a week and some fancy chip/bus hacking." It didnt require either.

In an interview with Ars, Starbug told the site that figuring out how to beat the system took 30 hours; however, now that its figured out, the process would take about half an hour.

It took me nearly 30 hours from unpacking the iPhone to a [bypass] that worked reliably. With better preparation it would have taken approximately half an hour. I spent significantly more time trying to find out information on the technical specification of the sensor than I actually spent bypassing it.
I was very disappointed, as I hoped to hack on it for a week or two. There was no challenge at all; the attack was very straightforward and trivial. The Touch ID is nevertheless a very reliable fingerprint system. However, users should only consider it an increase in convenience and not security.

Starbug has won the Is Touch ID Hacked Yet competition and is donating the pledged funds to Raumfahrtagentur, a spinoff from CCC-Berlin.
Check out the video below or hit the link to read the full interview.


Go to link Download

Read more »

How to receive Distant FM Signals

How to receive Distant FM Signals


share something which might be unknown to some people. Receiving far away FM stations is called FM Dxing. I am from Ranchi(Jharkhand) and unfortunately here we dont have private FM stations except Vivid Bharti  . But i do listen to FM stations of Kolkata(Calcutta).

I want to make it clear to everybody that high frequency signals travel in the line of sight and these high frequency signals can either be FM or AM.

So, saying that FM signals travel in the line of sight is partially correct.

Low frequency signals like MW and SW also travel in the line of sight but they also get reflected by the one of the layers of atmosphere. So we can listen to faraway stations in these bands.
High frequency signals do not get reflected rather they pierce the layers of atmosphere and are lost in space leaving only one option: line of sight transmission.

But there is a special layer in the atmosphere called ionosphere which helps in reflecting the high frequency signals. Although not always present, this layer is responsible for FM Dxing.


To receive distant signals you need:
1) A good FM receiver. (I have got my Sony home theatre which works very well)
2) An FM Booster(Not those TV boosters)
3) A home made antenna.


You can get a plenty of circuits diagrams in the internet for FM booster.
Print out the diagram and either make it yourself or give it to the technicians who repair TV and radio.
The antenna can be a simple one like a whip antenna if you want to listen to nearer stations or it can be a complicated one like Yagi antenna. I made a quadrangular antenna.

With the help of above things, i receive FM stations of Calcutta. In a straight line it is more than 350 Kms from Ranchi. The signals become clearer in the night and they become stereo from mono.
Thus my setup receives whatever signals it gets from line of sight and from ionosphere reflections.

Some other facts:-
Aircraft communications also use high frequencies (118-136Mhz) and they talk in line of sight BUT THEY ARE NOT FM, they are AM (amplitude modulated) signals like those of Medium wave and Short wave.
One interesting thing:- One day when i switched on my system i wasnt able to receive Kolkata FM stations rather i was receiving radio stations of Burma(Myanmar) . I took out the map and measured the distance of Burma. It was more than 1500 Kms. Isnt that interestingMay be due to changes in the ionosphere i was able to receive them.Go for it.

Go to link Download

Read more »

How To Install OS 6 On Your BlackBerry Device

How To Install OS 6 On Your BlackBerry Device


Here is step by step guide to install OS 6 on your BlackBerry device:

> Backup Data
Use Blackberry Desktop Manager to back up your data. Connect your BlackBerry device to your computer using the USB sync cable. If you have a password enabled, enter it. Click Yes when your phone asking if you want to enable mass storage mode.

Open BlackBerry Desktop Manager, enter your password (if you have), wait until the desktop software recoqnizes your devive, and then you can simply access the backup options by clicking the “Back up now” icon. A dialogue box will appear with the Backup type options: Full, Quick, or Custom. Click on Full (all device data and settings). To begin, click on Back up and a progress bar will track the process. 


> Backup Third Party Application
Use Blackberry Desktop Manager to back up your third party application. Click on Device (at the upper left corner), scroll through the drop down menu and click on Switch Devices. When the next dialogue box appears, click on the picture of your device. On the next dialogue box, uncheck Device Data, leaving only Third Party Applications checked. Click Next and Desktop Manager will start reading and saving the information on your device. When it’s finished reading the information on your blackberry, click Cancel. Continue these instructions:

  • Search your computer in hidden and system files / folders for a folder named with your pin (click on Start menu, search and type in %temp% to find your temp folder with the folder named as your pin). Or you can locate the pin folder by following this path: C:Users[name]AppDataLocal SettingsTemp.
  • When you find it copy and paste the folder to another location (you can paste it to a backup folder you created specifically for blackberry information). Now you can exit desktop manager. 

> Install OS 6 On Your Computer
Uninstall any old Blackberry OS builds from your computer if you have them (go to Control Panel > Uninstall Programs and select BlackBerry Device Software).
Download and install OS 6 to your computer (double click on the OS .exe file and let Windows install it). After the OS installed, go to:
  • C:Program FilesCommon FilesResearch In MotionApploader *Then you should find and delete the Vendor.XML file.

> Wipe Device Using BBSAK

When BBSAK has installed on your computer, plug in your device, open the program. It will ask for a password, if you have a password enabled, enter it (otherwise leave it blank) click OK. Click Wipe device, A dialogue box will appear, click yes. Your device will reboot and giving you a 507 error. Don’t be alarmed. You have wiped the device clean and there is no OS on the device at all.

> Installing OS 6 On Your BlackBerry Device
Go to C:Program FilesCommon FilesResearch In MotionApploader double-click the “loader.exe” file.


The App Loader will then start and your device “PIN” should show up in the drop down menu. Click “NEXT” and follow the prompts. The App Loader will go through the process of loading the OS 6.
 
The phone will then boot for the first time (take up to 8 minutes), wait for the boot completely before disconnecting. Do a battery pull afterwards and letting it reboot (take up to 2 minutes), to double check that there are no problems after the initial boot.

> Re-installing Third Party Application
Plug in your device, load up DM, click on Application > Import files, browse your third party application backup file. Select the option that allows you to choose what items you would like to re-install. Wait about 10-20 minutes for the process to complete and your phone to reboot completely. Continue with the next step.


> Restoring Data
Click on Device > Restore, to which then you will be prompted with an option to choose your backup file. Select the most recent, and then select All device data and settings, click on Restore. Wait for the process to complete and your phone to reboot completely before disconnecting. Do a battery pull. Try to do another battery pull in the next hour as well...just for good measure.


Enjoy the latest OS6 on your BlackBerry !


Go to link Download

Read more »

How to clear recommendation history in Google Play Music

How to clear recommendation history in Google Play Music


If you head into the settings page of the desktop Google Play Music site then you’ll see a new option that rolled out today called “delete recommendation history” that will do just that and allows you to remove the history used to give you recommendations and customise radio. It’s worth noting that this will not remove ratings and play counts on individual tracks.

HOW-TO-Delete-recommendation-history-Google-Play-Music
If you head into the settings page of the desktop Google Play Music site then you’ll see a new option that rolled out today called “delete recommendation history” that will do just that and allows you to remove the history used to give you recommendations and customise radio. It’s worth noting that this will not remove ratings and play counts on individual tracks.

Screen-Shot-

How to delete recommendation history -


Head on to the Google Play Music settings page

Scroll down to the bottom of the page

Hit delete and confirm the deletion on the warning screen that pops up.

This will clear your recommendation history used to suggest tracks you might like based on your listening history, perfect for if you’ve been sharing an account and someone has been listening to Taylor Swift and you’re recommendations are all messed up!

Don’t forget to Share it with your friends via Facebook & Google+ and Twitter, And if you like the article How to clear recommendation history in Google Play Music and you may even Subscribe for New post, to get directly in your mail inbox.[post_ad]

Go to link Download

Read more »

How To Install Cydia On iOS 8 iOS 8 1 Using Pangu App

How To Install Cydia On iOS 8 iOS 8 1 Using Pangu App


Pangu jailbreak for iOS 8.1 - iOS 8 , recently released, turned out to be the first jailbreak for iOS 8. Unfortunately, the jailbreak doesnt install Cydia. Now Cydia can be installed using the Pangu iOS app. This method is too simple, all you need is just a few taps.


In this article, we explain you how to install Cydia on iOS8.1- iOS 8 Using Pangu app.Click here to continue reading.                                                                                                                                   


Go to link Download

Read more »

How To Make Sale In Travel And Tourism Industry Via Email Marketing

How To Make Sale In Travel And Tourism Industry Via Email Marketing


Times have become tough and businesses around the world are using e-mail marketing as a cost-efficient approach for producing brand exposure and increasing return on investment; particularly those working in the travel and tourism industry. Incredibly, the nature of the travel and tourism industry is by default, helpful in obtaining most favorable results from email marketing, maybe even more than other industries.
tourism-email-marketing
--> As with all departments of the hospitality industry, tourism demands creating relationships with guests through personal and specialized conversation. Developing sustainable long-lasting relationships and getting loyal high value hospitality, travel and tourism customers are a rising challenge, particularly in this economic environment. E-mail marketing goes on to receive marketers interest because it generates direct income opportunities with past, present, and future consumers. It facilitates you to cost-effectively interact with a distinct audience in a way that is instant and significant. It is easy to build and carry out, and results could be determined in real-time.


Targeting tourists means acquiring the right people with your offer at the exact time. Potential tourists or travelers tend to start their online research considerably far ahead of when they really book their trip arrangements. What kinds of tourist destinations attract them? Do they choose to travel by air or train? Are they attracted towards sea or land travel? Are they going for business tour, holiday voyage, or both?
Though, with the broad range of travel and tourism industry all combating for a slice of the market, it is vital that you optimize your e-mail marketing messages to become visible in the crowd. Here are some suggestions on how to sale via email marketing in the tourism industry:
1. To start your email marketing campaign just consider about travelers scenario because no two traveler or tourist scenarios are the same. Definitely, all tourism businesses must be planned to make the best use of their appeal to guests, but every person has different choices. Customers who have enlightened you or your permission based email marketing database about their personal selections and interests, have provided very useful insights into what they want, and eventually, has set you with information of how to reach them. Moreover, this knowledge may also, if you select, allocate you to adapt your services or entertainment in a way that accommodates their needs which, in turn, will help you in enhancing your businesses and increasing revenue.
2. Trying to make your customers feel appreciated is just as significant as accommodating them. Also, succeeding in this effort will not only generate sales, but also urge repeat business. The most efficient way to do this, apart from the method by which you interact with them, is to give them special incentives like discount coupon for their next visit, or if you are in the hotel business, give them free accommodation for another night if they book for definite time duration. Even after your guests have gone, send them a short email showing gratitude for their visit, and ask them to come back.
3. At last, make your e-mail marketing messages viral by signifying that your customers tell their friends and coworkers about you. Insert a forward to friend link in your emails that makes it simple for them to share your information. In fact, the power of recommendation is by far the most effectual form of promoting your business, in that prospective customers are more probably to select your service if it is recommended by a source that they think to become convincing. This is particularly suitable for customers who have already availed your service, or required your accommodation facility; in this case you should thoughtfully support them to make their network of friends aware of the satisfaction they obtained from your business.
Thus, there is always room for expansion, no issue how large a company is. Improving brand awareness is necessary, travel companies will all have a huge contact list, so delivering an e-mail once a month with present deals, discounts and latest information will be the difference between those customers booking a holiday with the travel company they got an e-mail from or going somewhere else.
Read More About: 5 Ways To Maximize Your Hotel Business Using Email Marketing

Go to link Download

Read more »

Hot Cake Enjoy Free 100 Mins to All MTN Users

Hot Cake Enjoy Free 100 Mins to All MTN Users


Hot Cake: Enjoy Free 100 Mins to All MTN Users

MTN is not through with their festive
season surprises to their customers yet, and I know it as I know my name that something more is still cooking.
Sometimes last week, they dish out 6,000MIN Airtime to 60% of their
customers and only those who has partner where able to use it successfully.
Just this evening again, I got a message from Mtn Yello Surprise! You have received 100 free minutes to call a number randomly selected from your called numbers list! I was like ah….. what kind of surprise is this, after all I wasn&#8217;t eligible for the free 6,000 min they gave last week.
How Do I know if I’m Eligible For This
Offer?
Just wait for the message perhaps they are actually randomly selecting those numbers. Or better still, text
FRIEND to 400 then wait for their reply.
The question now is are you eligible or MTN is simply not sure if you have a genuine friend or not?

Go to link Download

Read more »

Tuesday, August 30, 2016

How To Root Infinix Zero X506 In Less Than 5 mins With Root Genius

How To Root Infinix Zero X506 In Less Than 5 mins With Root Genius


Hi dear reader, Want to know how you can root your infinix zero x506 ? Fellow my simple steps and in less than 5 mins your inifinix X506 should be rooted...

Requirements??
A Windows PC/Laptop
An Inifinix Zero X506
Battery % at 100% 

Lets Begin...
Root Genius is One click root tool designed to work on Windows Computer. It helps user to root their Android Smartphone in a single click. Here, i am going to guide you through on  how to use Root Genius to root the latest infinix zero x506.


Step 1: Enable USB Debuggin on your Android Smartphone. To enable USB debugging, openSettings>> Developers option>>> USB Debugging >> Tick to Enable

Tip: for Android 4.2.2 or above, to show this option Go to Settings>> About Phone >>Built Number (Tap on it for 5-8 times).
Step 2: Download Root Genius Application on your PC here and open it
Step 3: connect your Android device to the computer (with USB Debugging enabled).
--Once your Infinix zero is connected successfully to the computer, Root Genius will automatically detect your Device.

Step 4: Click on the “Root It” button to begin the rooting process


-- Root Genius will automatically “Root” your Android Device and also install the KingUser Application On your device


Step 5: Your Infinix Zero X506 is rooted. :0 ;)

To check if your Infinix Zero is rooted correctly, open any app that requires root access if the app works flawlessly, it means your device has been successfully rooted.

Alternatively, you can head over to Google play store and download RootChecker app to verify root access.

Photo Credits to: YomiProf

DISCLAIMER
i shall not be held responsible for what ever that may happen during your root process...

I hope this helps.

If you have anything to say or ask, Kindly make use of the comment form below. If you also want me to post a short review of your company or product, on this blog, do not hesitate to contact me.

Please, do not forget to SUBSCRIBE to this blog, so that you can be receiving future articles, freebies DIRECTLY into your email inbox, even when you are not online.

CLICK HERE TO SUBSCRIBE NOW!

Cheers!

Go to link Download

Read more »

How to stop Android apps running in the background

How to stop Android apps running in the background


Many apps that run in the background are doing so for good reason: syncing, providing location data or otherwise doing what they were designed to do. But not always. If you want to know which apps are running excessive background processes or want to stop apps running in the background entirely, read on to find out How stop Android apps running in the background. Apps are great, but they need to be kept on a tight leash.

Process stats and battery usage


If you want to know which apps are running background processes and how power hungry they are, both in terms of processing and battery, Android has the following built-in monitoring options:


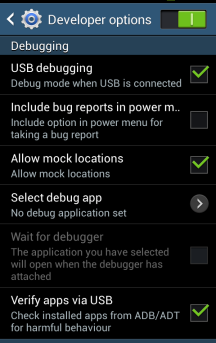
> Enable Developer Options by going to Settings > About Device and tapping the Build number until you are notified that


> Developer Options have been enabled.


> Go to Settings > Developer options > Process stats to see how much of the time your key apps are running. Tap any app to see how much RAM its using.


> Go to Settings > Battery then tap the individual apps to see how much battery theyre using.


stop-background-apps-1- Process Stats lets you know which apps are running all the time.


Which apps should I stop running in the background?


Two big culprits of background memory and battery use are games youre not playing, and music players youre not using. If you cant see a logical reason for an app you know well to be running in the background, then you should probably close it.

As a general rule, you should leave most apps or services that start with the word Google running. Really essential services wont let you force stop them anyway, but you also shouldnt stop the following apps:


Google Search, Google Play services, Google Contacts Sync, Google Keyboard, Google Play Store

The Process stats list should give you a pretty good idea of which apps you want to leave running in the background based on how much you use them.

  stop-background-apps-2-

You can see which apps are keeping your device awake in the battery settings.


How to disable, stop and uninstall background apps


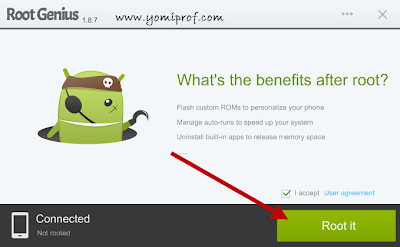
If you have an app that you think is using an unreasonable amount of processor power or seems to be running in the background way more than it should, then you can either:


Disable it in your App Manager by going to Settings > Applications > Application manager, tapping the app, then tapping Disable. 


Since the Lollipop update, you can close recent apps easily by tapping the Recent Apps navigation button on your phone (to the right of the home button), then swiping left or right to close apps you ran recently.


Delete it from your phone by going to Settings > Applications > Application manager, tapping the app, then tapping Uninstall.


Or Force Stop it by going to Settings > Applications > Application manager, swiping right to the Running tab, tapping the app, then tapping Force Stop.


If you have no idea what an app or service is, then you probably shouldnt stop it, unless its really using up a lot of RAM or battery, and you dont mind risking your phone crashing.

 
stop-background-apps-3-
Less crucial apps (left) can be uninstalled. Crucial system services (right) cant.

Greenify


Greenify is an app hibernation app, that lets you put apps to sleep when youre not using them. Its basically an automated version of force closing or disabling apps every time you stop using them and then turning them back on when you need them. But doing that manually is a pain. Hence Greenify is one of the best app management apps around. [post_ad]
 
stop-background-apps-greenify-Greenify makes app management a breeze. Greenify

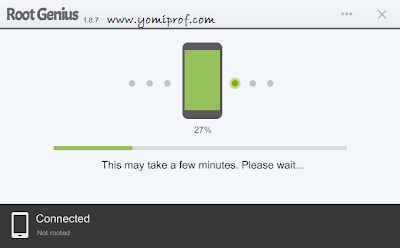
To get the full benefits of Greenify you need root access, and we have guides on how to root your Nexus 5, HTC One M8and Galaxy S5, among other phones. Just search Wide Integrated for your device name and factory reset. 

Non-rooted users, for example, wont be able to automatically hibernate apps, but can simply flick a widget switch to put your apps to sleep (not a bad fix if you dont want to root your device). If youre serious about managing your background processes, Greenify is the tool you need.

Don’t forget to Share it with your friends via Facebook & Google+ and Twitter, And if you like the article How to stop Android apps running in the background and you may even Subscribe for New post, to get directly in your mail inbox.


Go to link Download

Read more »

How to start a BlackBerry smartphone in safe mode

How to start a BlackBerry smartphone in safe mode


How to start a BlackBerry smartphone in safe mode - When starting the BlackBerry smartphone, safe mode can be used to prevent third-party applications from running automatically. Safe mode is designed to allow troubleshooting or remove any unwanted applications.

How to start a BlackBerry smartphone in safe mode

To turn on safe mode, complete the following steps:
1. Remove and reinsert the BlackBerry smartphone battery.
2. When the red light-emitting diode (LED) light goes out, press and hold the Escape key as the BlackBerry smartphone is loading. See KB05470 for the location of the Escape key.
3. When the dialog box appears, click OK.

Note:
Safe mode is indicated by a safe mode indicator in the BlackBerry smartphone status section of the Home screen.
To turn off safe mode, remove and reinsert the BlackBerry smartphone battery.


AbiNaaBie Cinta BieNaaAbi

Go to link Download

Read more »

How suspected Boko Haram insurgents killed 19 people in Borno

How suspected Boko Haram insurgents killed 19 people in Borno


Gunmen dressed in military fatigues and suspected to be Boko Haram insurgents engaged in a shooting spree which resulted in the deaths of 19 people near Nigeria’s border with Cameroon in Borno State.
An eyewitness who was able to escape the pandemonium said that the attackers who were brandishing automatic weapons had blocked the road near near the town of Logumani which was 30 kilometres from the border.
The gunmen reportedly arrived on motorcycles and began shooting and attacking motorists with machetes. The assailants reportedly burnt three trucks.
The Nation reports:

“We have recovered 19 dead bodies from the scene of the attack by Boko Haram gunmen,” Musa Abur, leader of a civilian vigilante group in the area told French News Agency (AFP).
“Five of the victims, who included two truck drivers and their assistants, were shot dead while the rest were slaughtered,” he said.
He said the gunmen had attacked the border town of Gamboru Ngala near Logumani late on Friday but were repelled by soldiers and local vigilantes.
A passenger who survived the attack gave a similar account.
“We were asked to get out of our vehicles and lie face down by nine men dressed as soldiers who blocked the road around 5:00am,” the man who gave his name as Buba told AFP.

“They shot dead five people and went about slaughtering 14 others before someone called them on the phone that soldiers were heading their way,” he said.
“They abandoned the rest of us and sped into the bush on their motorcycles,” added Buba who was shot in the leg.
The military authorities last night confirmed the attack.
The Director of Army Public Relations, Brig. Gen. Ibrahim Attahiru, confirmed the attack last night.
The Army spokesman, however, gave the casualty figure as four. According to him, the insurgents mounted a roadblock at a border town and intercepted a truck conveying foodstuff. “They killed four people on the spot. Our men went after them and killed a couple of them. Our men are still going after some of them that are on the run. Apprehending them is just a matter of time,” Gen. Attahiru.

Go to link Download

Read more »

How To Install Windows 8 or 8 1 From a USB Device

How To Install Windows 8 or 8 1 From a USB Device


Installing Windows 8 or Windows 8.1 from a USB device, like a flash drive, has become one of the most common and essential thing this days.
It’s not surprising why many new computers, especially tablets and smaller laptops and desktops, no longer have optical drives.
USB flash drive
That Windows 8 install disc is of no use and importance if there is no disk drive available to run the DVD!
If you want to install Windows 8 from a USB device, you’ll need to copy the setup files from the DVD to the USB drive. But, by copying it simply there won’t be everything. Windows 8 software is also sold as a downloadable ISO file which, if you choose to buy Windows 8 that way,it requires similar steps to get it properly copied to a USB drive.
Irrespective of the kind of Windows 8 DVD software you have, you need a flash drive to copy the setup, or a Windows 8 ISO file to achieve the same goal. The following steps will guide you through the installation process with the Windows 8 installation files properly copied to a flash drive.
Duration: Transferring/ Copying the Windows 8 installation files into a flash drive or other external USB device will take between 20 to 30 minutes, depending on the format your copy of Windows 8 is in right now and the speed of your computer.
Compatibility: The following steps can also be used for Windows 8 (standard) or Windows 8 Pro, as well as those editions of Windows 8.1.
Required Materials:
  • A USB flash drive (4 GB for 32-bit, 8 GB for 64-bit)
  • A Windows 8/8.1 DVD or ISO
  • Availability of a computer with a DVD drive, if you have a Windows 8 DVD installation disk) with either of these operating systems (Windows 8, Windows 7, Windows Vista, or Windows XP) installed or the Availability of an External USB DVD Drive.
NOTE: If you have a Windows 8 ISO file and you want to transfer it to a flash drive, begin with second step (Step 2) but if you have a Windows 8 DVD instead, Proceed from Step 1.

Installing Windows 8 or 8.1 From a USB Device

  1. Create an ISO file from the Windows 8 DVD. This is the process in which you create a single file, called an ISO image, which contains all the data stored on the Windows 8 setup DVD disc. This ISO file can be created with Daemon Tool or Ripping. Once you have an ISO image created from your Windows 8 disc, come back here and continue on with this tutorial which will explain how to get that ISO file onto a flash drive.
    Note: If you have created your ISO file already with your favorite program, called “ripping,” then you can use whatever application or software you mostly use. However, if you’ve never created an ISO image, or don’t have a program installed right now that does it, Kindly search for tools and application with a video tutorial on how to Create an ISO file.

  2. Download the Windows 7 USB/DVD Download Tool from Microsoft and then install it. This is a free Microsoft program that helps to properly format your flash drive and then copies the contents of the Windows 8 installation ISO file you have to the USB flash drive.
    Note: Don’t be disturbed by the program title “Windows 7”. This program works perfectly well with Windows 8 ISO files which is compatible with all these windows Operating systems, e.g. Windows 8, Windows 7, Windows Vista, or Windows XP.

  3. Launch the Windows 7 USB DVD Download Tool program. The shortcut should appear on the Desktop, as well as in “All Programs” on your Start menu, depending on Version of Windows you installed on your computer.
     
  4. On Step 1 of 4: Choose ISO file screen, Click Browse
     
  5. Locate, and then select, your Windows 8 ISO file. Then click or touch Open. Note: If you have downloaded Windows 8 from Microsoft, check your Downloads folder or your Desktop for the ISO image. If you created an ISO image from your Windows 8 DVD, the ISO file will be wherever you have created it.

  6. Click Next.
     
  7. At the Step 2 of 4: Choose media type screen, Select USB deviceNote: At this stage, you can see that there is also a DVD option. Since our aim is to transfer Windows 8’s setup files to a USB flash drive, this tool you can also be used to burn a Windows 8 ISO image to a DVD or BD disc.

  8. At the Step 3 of 4: Insert USB device screen, choose from the drop-down list the USB flash drive or USB external hard drive which you want to copy the Windows 8 setup files into and then click Begin copying. Tip: If the USB storage device you’re planning to use hasn’t been connected, you can insert it into the computer now and then click the blue refresh button to make it show up on the list.

  9. Click Erase USB Device if you are prompted with a “Not Enough Free Space window” message. If this message doesn’t appear, don’t worry, it means that your flash drive or external hard disk is already empty. Note: Every data/file you might have on this USB drive is going to be deleted as part of the process of getting the Windows 8 installation files copied.

  10. On Step 4 of 4: Creating bootable USB device, At this point, the Windows 8 installation files will begin to copy, it just takes few minutes for the Windows 7 USB DVD Downloaded Tool to prepare the drive. The first Process you will see is Formatting, which will be done under few seconds, depending on the size of your USB drive. The next process will be Copying files which could take up to 30 minutes long, depending on which Windows 8 ISO file you’re working from, as well as You computer speed.

  11. If all stages were successfully completed, then the next screen should display Bootable USB device created successfully with a Status that says Backup completed. You can now close the Windows 7 USB DVD Download Tool program window. The flash drive, or other external USB drive you’re using has now been properly configured as a bootable device and also has the necessary files to install Windows 8 on any system.

  12. Boot from the USB device that you just created to start the Windows 8 install process. Tip: If the Windows 8 setup process doesn’t start, it’s very likely that you’ll need to make boot order changes in the BIOS. See How To Change the Boot Order in BIOS if you need help doing that.
    Tip: If you have a UEFI based system and you still can’t boot Windows 8 Setup from the flash drive, even after setting the USB device first in the boot order, see Tip #1 below for help.

Tips & More Information

1. The Windows 7 USB DVD Downloaded Tool formats your USB drive as NTFS, a file system that many UEFI based computers will not boot from when on a USB drive.
To work around this issue, do this:
  • After Step 11 above, copy all the files from your flash drive to a named folder on your PC.
  • Manually Format the flash drive, with the older FAT32 file system option.
  • Copy back all the files from the named folder you created in Tip 1.1 back to the flash drive.
  • Repeat Step 12 above.
2. There are other alternative methods for getting a Windows 8 or 8.1 ISO image properly onto a USB flash drive but I prefer the procedure I’ve outlined above, but if you have trouble with it, that general ISO-to-USB procedure should work as well.
3. Still having trouble installing Windows 8 or 8.1 from a flash drive or other USB device? Use the contact page, social networks or via email, and more.
Still having trouble installing Windows 8 or 8.1 from a flash drive or other USB device? Use the contact page, social networks or via email, and more.

Go to link Download

Read more »

How to Hack Wi Fi password using Android 100 working

How to Hack Wi Fi password using Android 100 working


How to Hack Wi Fi password using Android [100% working ] 

Do you want to test your network security? It used to be that you needed a desktop OS such as Windows or Linux installed on a computer with a specific wireless network card. Now, however, you can also use certain Android devices to scan and crack wireless networks. These tools are available for free as long as your device is compatible. Hacking routers without permission is illegal. These steps are provided to test the security of your own network.


Method 1 of 2: WPA2 WPS Routers


1. Root a compatible device-  Not every Android phone or tablet will be able to crack a WPS PIN. The device must have a Broadcom bcm4329 or bcm4330 wireless chipset, and must be rooted. The Cyanogen ROM will provide the best chance of success. Some of the known supported devices include:
  • Nexus 7
  • Galaxy Ace/S1/S2/S3
  • Nexus One
  • Desire HD

2. Download and install bcmon-  This tool enables Monitor Mode on your Broadcom chipset, which is essential for being able to crack the PIN. The bcmon APK file is available for free from the bcmon page on the Google Code website.
  • To install an APK file, you will need to allow installation from unknown sources in your Security menu.

3. Run bcmon-  After installing the APK file, run the app. If prompted, install the firmware and tools. Tap the "Enable Monitor Mode" option. If the app crashes, open it and try again. If it fails for a third time, your device is most likely not supported.
  • Your device must be rooted in order to run bcmon.

4. Download and install Reaver-  Reaver is a program developed to crack the WPS PIN in order to retrieve the WPA2 passphrase. The Reaver APK can be downloaded from the developers thread on the XDA-developers forums.


5. Launch Reaver- Tap the Reaver for Android icon in your App drawer. After confirming that you are not using it for illegal purposes, Reaver will scan for available access points. Tap the access point you want to crack to continue.
  • You may need to verify Monitor Mode before proceeding. If this is the case, bcmon will open again.
  • The access point you select must accept WPS authentication. Not all routers support this.

6. Verify your settings- In most cases you can leave the settings that appear at their default. Make sure that the "Automatic advanced settings" box is checked.


7. Start the cracking process-  Tap the "Start attack" button at the bottom of the Reaver Settings menu. The monitor will open and you will see the results of the ongoing crack displayed.
  • Cracking WPS can take anywhere from 2-10+ hours to complete, and it is not always successful

Method 2 of 2: WEP Routers


1. Root a compatible device- Not every Android phone or tablet will be able to crack a WPS PIN. The device must have a Broadcom bcm4329 or bcm4330 wireless chipset, and must be rooted. The Cyanogen ROM will provide the best chance of success. Some of the known supported devices include:
  • Nexus 7
  • Galaxy S1/S2/S3/S4/S5
  • Galaxy y
  • Nexus One
  • Desire HD
  • Micromax A67


2. Download and install bcmon- This tool enables Monitor Mode on your Broadcom chipset, which is essential for being able to crack the PIN. The bcmon APK file is available for free from the bcmon page on the Google Code website.
  • To install an APK file, you will need to allow installation from unknown sources in your Security menu. 

3. Run bcmon- After installing the APK file, run the app. If prompted, install the firmware and tools. Tap the "Enable Monitor Mode" option. If the app crashes, open it and try again. If it fails for a third time, your device is most likely not supported.
  • Your device must be rooted in order to run bcmon.


4. Tap "Run bcmon terminal"-  This will launch a terminal similar to most Linux terminals.Type airodump-ng and tap the Enter button. AIrdump will load, and you will be taken to the command prompt again. Type airodump-ng wlan0 and tap the Enter button.


5. Identify the access point you want to crack- You will see a list of available access points. You must select am access point that is using WEP encryption.


6. Note the MAC address that appears-  This is the MAC address for the router. Make sure that you have the right one if there are multiple routers listed. Jot this MAC address down.
  • Also note the Channel that the access point is broadcasting on.

7. Start scanning the channel- You will need to collect information from the access point for several hours before you can attempt to crack the password. Type airodump-ng -c channel# --bssidMAC address -w output ath0 and tap Enter. Airodump will begin scanning. You can leave the device for a while as it scans for information. Be sure to plug it in if you are running low on battery.
  • Replace channel# with the channel number the access point is broadcasting on (e.g. 6).
  • Replace MAC address with the MAC address of the router (e.g 00:0a:95:9d:68:16)
  • Keep scanning until you reach at least 20,000-30,000 packets.

8. Crack the password-  Once you have a suitable number of packets, you can start attempting to crack the password . Return to the terminal and type aircrack-ng output*.cap and tap Enter.

9. Note the hexadecimal password when finished- After the cracking process is complete (which could take several hours), the message Key Found! will appear, followed by the key in hexadecimal form. Make sure that "Probability" is 100% or the key will not work.
  • When you enter the key, enter it without the ":". For example, if the key was 12:34:56:78:90, you would enter 1234567890

Note:  Please note that this tutorial is solely for educational purpose and I am not responsible for any kind of illegal usage of this tutorial. 

Go to link Download

Read more »