Showing posts with label flash. Show all posts
Showing posts with label flash. Show all posts
Monday, November 28, 2016
How To Make China Phone Flash Cable See here
How To Make China Phone Flash Cable See here
Many of new member face the problem, how they make a usb to com cable for flash his china phone. with this usb to com cable any one can use free soft for do software operation on his phone.
with a usb to com cable (as like ringtone cable) you can make your own cable for flashing, format, ect for china phone.
i explain here with a Motorola c261 usb ringtone cable, its always do better work for me.
first collect a cable of Motorola c261 usb ringtone cable (available in market) like this-


in cable middle have intact a box by plastic. in it have a mini pcb. need to open this
mini box for see and work on it. see picture-


after open it, now we see a mini pcb, its one side have 5 cable, which is connect to pc usb, no need to touch it. its ok.
we work on pcb opposite cable connection, here have 3 cable. 1 tx, 1rx, 1gnd. see pic-


here have 3 cable, now make a connection for V+ or B+. when we flashing our phone we need power supply for flash phone. so connect a cable with clip in this point, just use a diod from pc usb V+, see picture-

for cable driver, use it motorola usb to com cable drive or you can use PL2303 USB driver.
connect cable tx rx gnd B+ to phone tx rx gnd B+ and work your phone. now we found our won cable for flashing china phone.
for expert user : now you can collect a RJ45 connector. than join tx rx gnd in in RJ45 Socket. now you use any rj45 cable with it. and place it on any box, as like in any reject device, open box and leave it old pcb than place this pcb in it. and V+/B+ cable and clip stay in out or side for give power supply to phone. now you found a complete china box/device and use it.
with a usb to com cable (as like ringtone cable) you can make your own cable for flashing, format, ect for china phone.
i explain here with a Motorola c261 usb ringtone cable, its always do better work for me.
first collect a cable of Motorola c261 usb ringtone cable (available in market) like this-
in cable middle have intact a box by plastic. in it have a mini pcb. need to open this
mini box for see and work on it. see picture-
after open it, now we see a mini pcb, its one side have 5 cable, which is connect to pc usb, no need to touch it. its ok.
we work on pcb opposite cable connection, here have 3 cable. 1 tx, 1rx, 1gnd. see pic-
here have 3 cable, now make a connection for V+ or B+. when we flashing our phone we need power supply for flash phone. so connect a cable with clip in this point, just use a diod from pc usb V+, see picture-
for cable driver, use it motorola usb to com cable drive or you can use PL2303 USB driver.
connect cable tx rx gnd B+ to phone tx rx gnd B+ and work your phone. now we found our won cable for flashing china phone.
for expert user : now you can collect a RJ45 connector. than join tx rx gnd in in RJ45 Socket. now you use any rj45 cable with it. and place it on any box, as like in any reject device, open box and leave it old pcb than place this pcb in it. and V+/B+ cable and clip stay in out or side for give power supply to phone. now you found a complete china box/device and use it.
Go to link Download

Monday, November 14, 2016
How To Flash Nokia Asha 201 Using Phoenix Software via USB Data Cable
How To Flash Nokia Asha 201 Using Phoenix Software via USB Data Cable
How You can Flash Your Nokia Asha 201 Using Phoenix Software via USB Data Cable

You Must Read This Carefully : How To flash your Nokia Phone Using Phoenix Service Software via Nokia USB Cable
Must Download : Download Nokia Asha 201 Latest Flashing File
Enjoy...
Go to link Download
Wednesday, November 9, 2016
How to Enable LED Flash for Calls and Notifications on Android and iPhone
How to Enable LED Flash for Calls and Notifications on Android and iPhone
Activating LED flash for alerts, phone calls and notifications from any messaging app is one of the known features that you can find on an iPhone device that is, by default, the iPhone device comes with this feature but not integrated on android phones.

You should know by now that vibrations or beep won’t pull our attention, but your attention can be easily pulled by the blinks of your LED flash without disturbing anybody around you. So, that’s why I recommend this option as best alternative to being notified without disturbance.


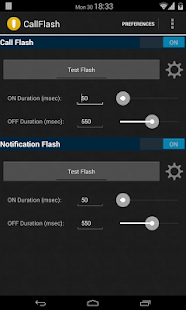
This is another useful app for flash notifications. It lets users setup LED flash notification while on silent, vibration and normal mode, repetitive mode, flash from being notified via messaging applications, disable flash with volume button features and battery saver option (flash gets disabled when battery is running down).
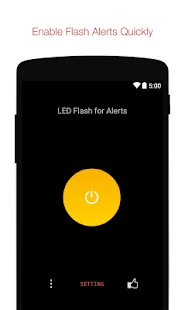

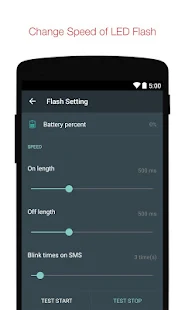
The above android apps for flash notifications highlighted all perform similar functions, jut that they differ by the extra features being integrated on them.
This feature serves as an alternative to sound alert, maybe, your device is in meeting mode, but you want to also get notified for any alerts or notification that comes into your device, then I advise you enable the LED flash for alert feature so you can get notified by your LED flash blinks.
You should know by now that vibrations or beep won’t pull our attention, but your attention can be easily pulled by the blinks of your LED flash without disturbing anybody around you. So, that’s why I recommend this option as best alternative to being notified without disturbance.
How to Enable LED flash for Calls and Notifications on Android
On android, this feature can be enabled with the help of some third party application. So, I’ll be revealing most of these apps to you.
1. Flash Notification for All Apps
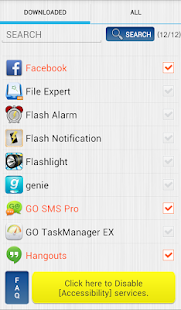
This is a well-rated “Flash for Notification” app that can be used to deliver flash notifications for all apps including the Whatsapp messenger, Email, Twitter, Instagram, Alarm/Clock, Messenger, and any other app. The application also delivers flash for incoming calls, SMS, missed calls and also unread notifications.
2. Call Flash: Alerts on Call-SMS
This is another useful app for flash notifications. It lets users setup LED flash notification while on silent, vibration and normal mode, repetitive mode, flash from being notified via messaging applications, disable flash with volume button features and battery saver option (flash gets disabled when battery is running down).
Watch a Little Preview:
3. Flash Alerts on Calls and SMS
WHATS NEW
- More stable
- Allow turn off Flash Alerts when battery low
- Turn off flash on call when you press volume key and power key
- Fix issue flash blink one time at call
- Auto start application when restart device if you turn it on
4. FlashME


The above android apps for flash notifications highlighted all perform similar functions, jut that they differ by the extra features being integrated on them.
Go to link Download
Read more »
Monday, November 7, 2016
How to Flash and Upgrade Your Dead Nokia Phones With Phoenix Service Software Through Usb Cable
How to Flash and Upgrade Your Dead Nokia Phones With Phoenix Service Software Through Usb Cable
As we all know that some of the Nokia mobile phone both Nokia s40 java phone and also with Nokia s60 Symbian phone get some little problems, the some of this problem is viruses attack.
This Tutorial will take you through how you can format your Nokia Phones be it Symbian or java with Phoenix service software using your original Nokia USB Data cable.
Flashing Nokia PHONES may affect your language depending on the firmware you downloaded e.g if your default firmware is Europe English and you download that of Asia, you may see changes in Language change- or product code change.
NOTE : Be prepared to do this at your own risk but dont worry nothing will be happen youll get success. However nobody will follow this tutorial and have any problem.The reason is this topic has been tested and it is trusted i have flashed my Nokia N97 and Nokia E6 together with Nokia-2700c severally with phoenix service software without any problem.

Some Tools Require you need Download before you begin:
Download Navifirm from here
Size : 674KB
Download Phoenix Service Software Here
Size : 153MB
NOTE : Also if you dont have the flash files of the phone that you want flash on your computer you must download the RM from this link below : Download All Nokia Flashing Files HERE


This Tutorial will take you through how you can format your Nokia Phones be it Symbian or java with Phoenix service software using your original Nokia USB Data cable.
Flashing Nokia PHONES may affect your language depending on the firmware you downloaded e.g if your default firmware is Europe English and you download that of Asia, you may see changes in Language change- or product code change.
NOTE : Be prepared to do this at your own risk but dont worry nothing will be happen youll get success. However nobody will follow this tutorial and have any problem.The reason is this topic has been tested and it is trusted i have flashed my Nokia N97 and Nokia E6 together with Nokia-2700c severally with phoenix service software without any problem.
Some Tools Require you need Download before you begin:
Download Navifirm from here
Size : 674KB
Download Phoenix Service Software Here
Size : 153MB
NOTE : Also if you dont have the flash files of the phone that you want flash on your computer you must download the RM from this link below : Download All Nokia Flashing Files HERE
After downloading all the required tools above you can now read on to complete the following process in other to flash your dead Nokia phone.
Now The Procedures will Start now :
1. First remove the cable from the phone and make sure it is turned off. If it is necessary, remove and insert the battery of the phone you want flash.
1. First remove the cable from the phone and make sure it is turned off. If it is necessary, remove and insert the battery of the phone you want flash.
2. Run Phoenix Service Software as administrator. (Windows Vista, 7: right click -> run as administrator; XP: login with administrator privileges). Select “NO CONNECTION” as your connection type
3. Then Select “Open Product” option in “File” menu look at the picture below.
4. A window will pop-up, select the mobile phone that you want to flash. Then product code of the mobile phone is on the sticker under the battery. (Usually RM-xxx)
5. Now Select “Firmware Update” option in “Flashing” menu.
6. Press “…” button on the top-right corner of the window to select the language pack / product code You want to flash on phone.
7. Now select the product code / language pack You want to flash on phone, and press OK button see the screenshot below.
8. Tick Dead phone USB flashing like you see in the below image.
9. Then scroll down and click on “Update Software” to start the firmware update procedure.
10. Follow the instructions: (if that method doesn’t work, press OK, then press power on button on phone and right after connect the usb cable)
11. Phone firmware update process should start immediatly.
12. When the update process finished, a window will appear: “Firmware updating succeded.”
13. You Can now remove your phone from cable, and try to turn it on. It may happen that the phone doesn’t turn on. Hardware error, firmware downgrade or bad certificate could cause that problem.
Also If you encountered any problem in the course of your flashing the phone, please drop your comment here and we should help you for solving the problem.
Special Thanks to LemmyMobile Where I get this experiency.
You can also Join our Facebook Group Discussion for more latest info.
Go to link Download
Wednesday, November 2, 2016
How To Share Transfer Large Files On Android Using Flash Share App
How To Share Transfer Large Files On Android Using Flash Share App
As the amount of android users steadily grow, the amount of files and data readily shared and transfered are on the increase too.
To seamlessly share files with other android devices, we introduce the File Share app.
What Makes The File Share App Unique?

1. This app is a lot faster than sharing files through Bluetooth
2. File Share can send pictures, music, files, even movies from one Android device to multiple android devices.
3. It utilizes your Wi-Fi and Hotspot to create a file sharing connection.
4. All you need to do is ‘Select and Shake’ for the other person to receive it.
The File Share app is easy to make use of but incase you are having challenges, we have laid out simple steps on how to use the file sharing app.
Download Android Flash Share Here
So, What Are Steps For Transferring Files With File Share App
1. Download the File Share App from Google Playstore.
2. After installation, create a username and password for your account.
3. After establishing your account, click ”Connect with friends”. Two options will come up, “create a connection” and “scan to join”
4. Open the File Share App on the device/s you intend sharing your files with. Click on connect with friends. Click ‘scan to join’ and a wifi connection will be established.
5. Select the files/apps you intend sharing.
6. Shake your Smartphone to send the applications you have highlighted.
7. For the receiving device/s, go to history on your Flash Share application and install that setup you just received.
8. Your device may notify you of data from an unknown source. To fix that, Go to your phone’s settings and open applications then check the box label unknown source.
Make sure you close the app so as to save battery power With File Share for android, Share your small and large data easily/Files.
Enjoy and share this to your friends.
Go to link Download
Tuesday, October 11, 2016
How To Flash Your Nokia Phone Using USB
How To Flash Your Nokia Phone Using USB
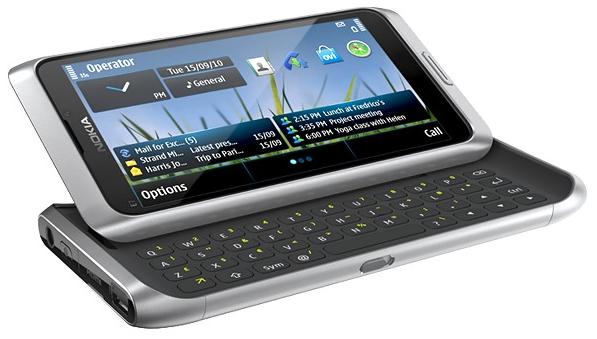
In this post, Ill be explaining how to flash your Nokia phone or update the firmware using just a usb cable without any flashing box like JAF, Cyclone and the rest of them. All that is needed is a usb cord, two softwares and an internet connection.
A lot of people often hear about "flashing mobile phones" without knowing what it actually means. Flashing a phone means re-installing the phones firmware files, that is, re-installing the operating system of the phone. When a phones operating system files are corrupt due to incompatible applications, virus attack and so on, flashing might be the only solution when restoring factory settings doesnt work. Apart from this, flashing a phone too can be used to update the firmware to a newer version, install a cracked firmware, "wake" a dead phone, etc.
I have to emphasize that flashing a phone shouldnt be done just for fun as it might be useful and dangerous at the same time. Yes, flashing a phone can wake a dead phone, so also flashing a working phone can kill it!
ALSO NOTE THAT THESE SOFTWARES
To flash your phone through usb, you need these:
i. Navifirm - to download the phones firmware
ii. Phoenix Service Suite
iii. Nokia PC Suite
iv. A good USB cable
1. Install Phoenix. This might take a pretty long time if youre using a slow computer but youve got to be patient
2. Run Navifirm but be sure to have a working internet connection before doing this. It connects to the internet and loads all available Nokia phones firmwares. This too also takes a long time and requires a steady internet connection so you need some patience here too.
3. Be sure your phones battery is charged to at least 50% though flashing should take less than 10 minutes.
4. Select your phone type under Products. It is located on the phone just beneath the battery. For example, N97s product type is RM-505, RM-133 for N73 and RM-596 for Nokia N8. (You can as well check it by dialling *#0000# in standby.)
5. Wait till it loads Releases. From here, you can see all available firmware versions. Select the latest you find there.
6. It now loads Variants, select your desired product code from the list. You can also check beneath the battery to find the original product code.
7. Now select all the files and download. Select Download with IDMM (Internet Download Manager) if you have it installed it on your PC. If not, select, Download with program and choose the destination folder.
8. Go to C:/Program Files/Nokia/Phoenix/Products
Create a folder with the name as your phone product type.
For example, for Nokia N97, the folder will be named RM-505
The firmware files you downloaded will then be located in C:/Program Files/Nokia/Phoenix/Products/RM-505
9. Now run PHOENIX and connect your mobile phone in PC Suite mode. If phoenix detects your phone automatically, skip steps 110-14.
10. In Phoenix, click File > Manage Connections > New.
11. Now select the type of cable you are using. If you are using DKE-2, CA-53, Micro USB cable, select USB.
12. Click Next. It will find your product and say FOUND. If it doesn’t find any, you can try changing your cable type by clicking Back.
13. Click Next and then Finish.
14. Now your cable type (USB) appears in the connection list. Select it. Click APPLY and then CLOSE.
15. Now select File > Open Product.
16. A list of RM codes will open. Select your phone’s RM code.
17. Now select File > Scan Product.
18. Your phone’s firmware info will appear at the extreme bottom of the Phoenix Service Software window.
19. Now select Flashing > Firmware Update. At this point, Phoenix will automatically load the firmware files we talked about in step 8. If it doesnt, make sure you named that directory accordingly and please go over step 8 again.
20. If everything up to step 20 goes well, select “Refurbish”, wait until the “Successful” dialog box appear (DO NOT touch or disconnect the phone or USB cable during the process). Press OK, phone will disconnect and restart.
At the end Phoenix will tell you to disconnect your phone as the flashing has finished butome phones may not boot up automatically after the flashing has finished. In those cases, remove the battery and then insert it and manually start the phone.
FLASHING A DEAD PHONE WITH PHOENIX
The procedure is almost same as above but with litle differences.
1. Start Phoenix. Connect your phone through USB Cable (we are flashing a dead phone so the phone is off)
2. Click File > Open Product. Select your RM code from the window that appears. Click OK.
3. Click File > Manage Connections. Select No Connection. Then APPLY and CLOSE.
4. Now select Flashing > Firmware Update.
5. Check the option “Dead Phone USB Flashing”.
6. Click Refurbish and the flashing process is started.
7. After some time, flashing will pause asking you to turn on your phone.
8. Press the POWER button of your phone until the backlight comes up.
9. Flashing will proceed. Your phone will automatically start when the flashing finishes. When done, you can safely remove your data cable from handset.
Go to link Download
Monday, October 10, 2016
How to Install Windows 8 7 from USB Flash Drive Bootable USB
How to Install Windows 8 7 from USB Flash Drive Bootable USB
Windows 8 is the Most Popular Operating System, It is been agreed by Most of the People. Most of the Users Use Windows 8 Only. There was a Census Taken on How Many % Of People Use Windows 8 and other Operating System. Guess What, Windows 8 is Been Used by 71% of the People in the World. That’s what made me say that Windows 8 is the Popular Operating System. Everybody want to Install Windows 8 on Their PC or Laptop. But its a bit complicated. We only Get Windows 8 DVD Now to Install. Its not take easy to install and risky, Because if we do a small mistake will lead to Repairing of your PC or Laptop. But Install Windows 8 From USB is very Easy Method. But Most them don’t know How to Install Windows 8 From USB. so we TechBeatBox Team, Went on a research and found the Way to Install Windows 8 From USB, Which we will teaching you Below.
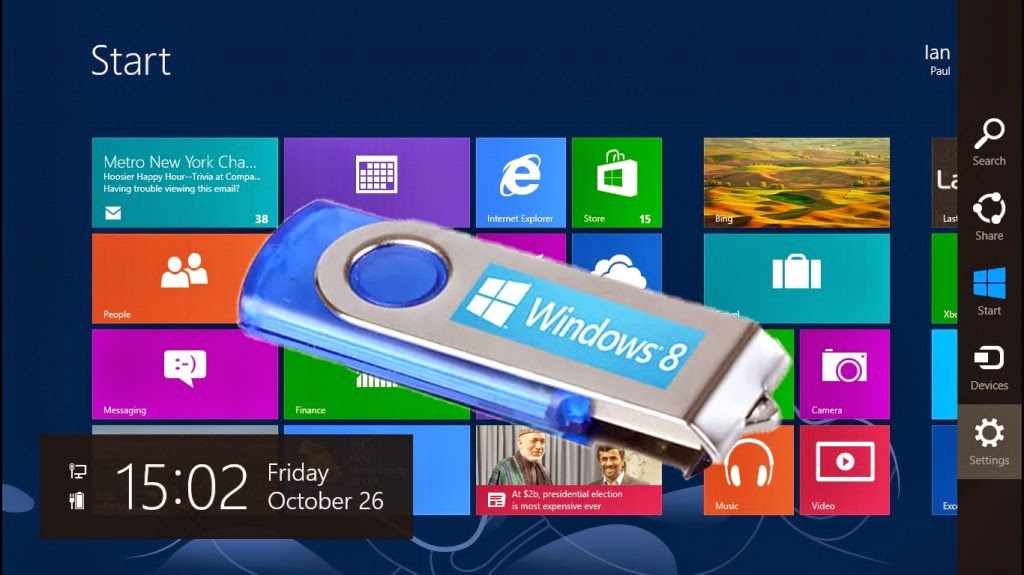
Requirements to Install Windows 8 From USB
- You Should Have Original Windows 8 DVD.
- You Should Have 8GB USB or Pendrive to Install Windows 8.
- Windows 7 USB/DVD Download Tool. Click here to Download
- A Computer or Laptop to Install Windows 8.
How to Install Windows 8 from USB (Bootable USB)
1. Download and Install Windows 7 USB/DVD from microsoft official website.
Firstly, You need to Download and Install Windows 7 USB/ DVD Download Tool (Download Link is Above ^).
2. Open Windows 7 USB/DVD Download Tool Open Windows 7 USB/DVD Download Tool (Open As Administrator), and Check Your USB Device Weather it is syncing or Not.
You Need to Format Your USB or Pen Drive First.
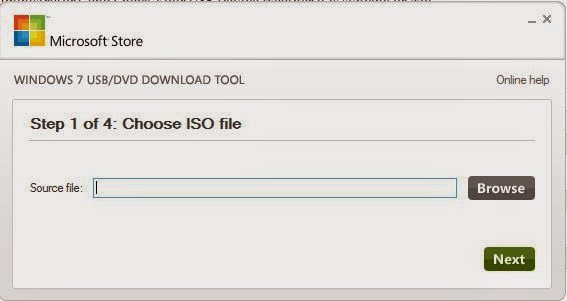
3. Choose the ISO File After you have opened Windows 7 USB/DVD Download Tool, You have to Choose ISO File
1. Click Browse.
2. Explore For the ISO File
3. And Open
4. And Click on Next.
4. Select the USB Device
After you have Choose the ISO File, You have to Select the USB Device, In which you want to Burn the ISO file (Bootable USB)
5. Click Begin Copying
After you have Selected the USB Device, Click on Begin Copying Button Below. Wait for 15 to 20 Minutes (Depends on your Computer Speed) for it to Copy the ISO File’s Data to Your USB.
Now You have done Creating a Bootable USB Device, Now you Have Install Windows 8 on Your Computer or Laptop Using this Bootable Device.
If they ask for windows 8 product keys copy it here All windows 8 pro free product keys.
How to Install Windows 8 from Bootable USB
1. Restart your Computer or Laptop Now you have to restart your Computer or Laptop to Install Windows 8 from USB Device. 2. Open BIOS Setup Utility After you have restarted your Computer or Laptop, at Booting you have open BIOS Setup Utiltiy (Press ESC + F9 or F2 or F10 or F12 or Delete), When you press these functional keys during Booting your BIOS Setup Utility will Open. 3. Select Removable Device in BIOS Setup Utility After you have opened BIOS Setup Utility, Select Removable Device in BIOS SETUP UTILITY.
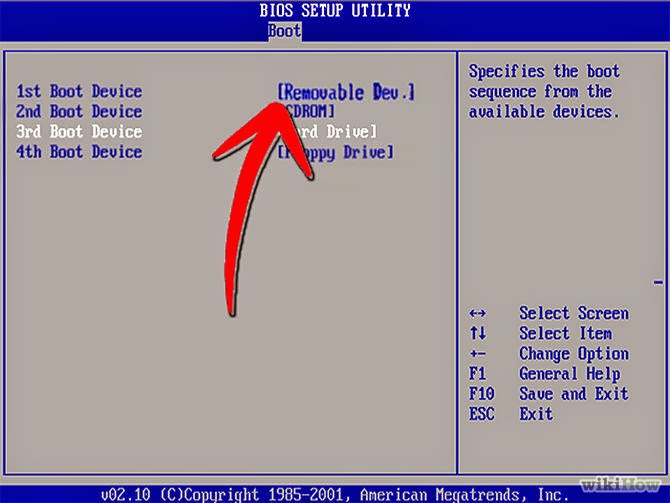
4. Windows 8 Setup will Appear After you Click on Removable Device, Windows 8 Installation Setup will Appear, Click on Install Now button.
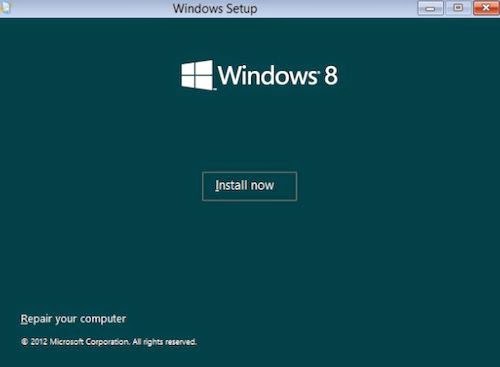
After you Click on Install Now, You will be redirected to Windows 8 Actual Setup to Install.
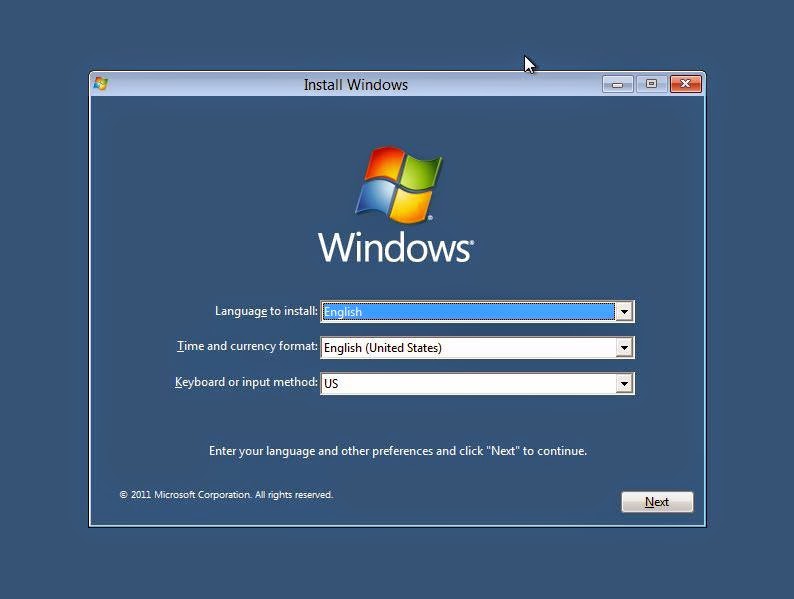
From Now the Installation Process is very Easy
1. Change the Language and Country 2. Create a Partition or Select the Main device to install.
3. Click Install That’s it, Now you have installed Windows 8 From USB.
I Hope you like this article on “How to Install Windows 8 from USB”, If you have any problem please don’t hesitate to Comment Below. If you like it and if this method is working, Please Share it with your friends via Social Networking Sites like Facebook, Twitter and Google Plus.
Enjoyyy....
Go to link Download
Friday, September 30, 2016
How to Install Adobe Flash Player on Android Phones
How to Install Adobe Flash Player on Android Phones
1. Make sure you can sideload apps (more info about sideloading). Go to Settings > Applications > and check “Unknown sources” for Android 2.2 or 2.3, and Settings > Security for Android 4.1
2. Now we have to procure the .apk installation file of flash. Download the latest version here.
3. Move the .apk to your phone and install it
4. Now pop open your stock browser: If you are on Android 3.0 or later, go to Menu > Settings > Advanced > Enable plug-ins For Android 2.2 or 2.3, go to Menu > [more] Settings > Enable plug-ins
5. You should now have Flash working on your device. Check this link on your phone to confirm that Flash is up and running. Finally, once it’s working, you may want to uncheck the “Unknown sources” option once again to keep your phone or tablet secure.
Go to link Download
Wednesday, September 28, 2016
How To Install Adobe Flash Player On Your Smartphone
How To Install Adobe Flash Player On Your Smartphone
Adobe Flash Player is no more available from Google Play Store. That means if you want to use Flash on an Android devices that doesnt deliver with it, youll have to depend on a PC or some unofficial applications. Luckily, its really easy to get Adobe Flash Player and running it manually on your device, expecting you understand all the risks.

Warning!
Before we start with this guide, please make sure that you understand all the risks associated with running the unsupported version of Adobe Flash Player on your smartphone.- There is NO support for Official version of Flash on Android now. That means you will not get any more security and stability upgrades, no support from official help channels if something wrong happens. Specifically, in case youre using this application on a device running on Android 4.1 (Jelly Bean), you can most likely to get a couple of issues related to the stability of flash files.
- The way that security upgrades are never again being created for Flash for Android implies that running this application could possibly open up some risks regarding security and malicious contents of Flash.
- When you install an application from a source other than Google Play Store (third party source), you have to disable one of inbuilt security feature of Android operating system. Keep in mind to enable it again later for the security of your mobile and tablets.
- If you own a device which is recently released with new and powerful hardware features, especially devices running on Android Jelly Bean version 4.1 and later, you may encounter security and stability issues with Flash contents.
Requirements
This flash application will run on all the smartphones and tablets running Android version Froyo, GingerBread, Honeycomb, Ice Cream Sandwich, Jelly Bean and Kitkat. In case you are using Android Jelly Bean OS, make sure that you have a Android stock web browser installed along with Google Chrome or Opera Mini/Mobile or UC Browser, as Chrome and other some browser for Android doesnt support Flash. Open your application drawer and find Browser or Internet application.
Steps To Install Adobe Flash Player
Step 1 - In this step we will enable installation of third party applications. Go to application settings and tick/enable/check on box "Unknown Sources". You can find this option here - For users having Android version 2.X and 3.X, open Settings and then Applications. Android 4.X users can find this in Settings application followed by Security option.

Step 2 - Download .APK file of Adobe Flash Player from these links. You can download directly from device or simply download it on PC and then transfer it to your device.
Adobe Flash Player 11.1 for Android 2.x and 3.x
Adobe Flash Player v11.1 for Android 4.0
Step 3 - Now find and open My Files (on any other file manager) in application drawer. Navigate to location of downloaded files and open and install .apk file. Tap Install on the next screen to confirm.
Step 4 - Open Androids stock browser. (As I already said, this flash player may not work with other browsers)
Step 5 - Android 3.x and 4.x users, press the Menu button of device (or three vertical DOTs in some devices). then tap on Settings, then Advanced and select Enable Plug-ins option. Tap on "Always On" option on the pop up.
Android 2.x users, press the Menu button, then settings (Menu > More > Settings in some unique devices!) and you will find Enable Plugins option. Tap on it and select "Always On".

Done! Just restart your browser and youre ready to use flash content on your Android device. If you want, you can disable the feature to install application from non-play store sources. It is OK if you want to keep this feature on. Using flash on mobile phones may be a crap experience. But still, this is useful is many situations. So, enjoy will flash on your smartphone and tablets! Please discuss about your suggestions and question in the comments section.
Go to link Download
Tuesday, September 13, 2016
How to Install Adobe Flash Player on Android 4 1 or Android 4 2
How to Install Adobe Flash Player on Android 4 1 or Android 4 2

As the reason for HTML 5 develops and disadvantages of Adobe flash player, Apple and Android made claimed announcement that they will not continue to use flash player on their device.Adobe also made statement that it will not continue to update and develop new flash player version.
As a replacement of flash player, HTML 5 is the new media technology on mobile browser. But we still have to use flash player on web most time.Now there is quite an easy way to tell you how to use flash player on Android 4.1 or Android 4.2 device.If you know how to install apk file on your Android device,there will be no problem for you to know what I am talking about.
Disclaimer: Installing third-party software means taking risks with your device and/or personal information. You will be responsible for any issues caused by the installation, and should only proceed if you are prepared to deal with these possible consequences.

Before you do this,Make sure your Android device meets the following two points
1 Download the latest Adobe Flash Player version to your Android device
2 There is a browser which support Adobe flash player on your phone(Mozilla Firefox is a good choice)
You can choose any version to download
Download the file. Apk of Flash Player version 11.1-111115012:http://d-h.st/wPd
Download the file flash_player version 11.1.115.17 :http://d-h.st/7Ds
Download the file flash_player version 11.1.115.20 :http://d-h.st/JXC
Download the file flash_player version 11.1.115.47:http://d-h.st/A6V
Or you can Google the latest Adobe Flash Player to download.
Instructions:
1 Settings——Security——Unknown sources
2 Find the downloaded apk file.If you download on your Android phone,the this file is in your "downloads app" folder.
3 Choose this apk file to install

Now Adobe Flash Player is on your Android phone.You can open to your browser to use it.If your browser was running,you just need to restart it.
Go to link Download
Friday, September 9, 2016
How to Flash Reset a Smartphones Easily
How to Flash Reset a Smartphones Easily
Most Internet Users Today use A Smartphone.

Sometimes its really painful when your device starts
malfunctioning and the last resort is to reset the
Phone.
Be careful. Resetting your phone will erase all content stored on your phone, including apps and games (along with
app data and game progress), text messages, call history, music, photos and more.
Windows Phones
To reset your phone
1. In the App list , tap Settings .
2. Tap About , then tap Reset your phone .
3. Youll receive two warnings. If youre absolutely sure you want to restore your phone to its factory settings, tap
Yes, then tap Yes again.
It might take a little while for the process to complete.
To reset an unresponsive phone:
If your phone is unresponsive and you cant reach Settings , you may be able to reset your phone using the hardware buttons. On Nokia Lumia phones (and some others), do the following to reset your phone:
1. Press and hold the Volume down and Power buttons at the same time until you feel a vibration (about 10-15 seconds).
2. When you feel the vibration, immediately press and hold the Volume down button until you see a large exclamation mark.
3. Once the exclamation mark appears, press the following four buttons in this order: Volume up , Volume down, Power , Volume down .
Your phone should now reset and restart itself. (It might take a while for the reset to finish.)
Android Phones
Each Phone Has Its restore method. The one that works for most phones.
Turn off the phone.
Hold the volume up button and power button at the same time.
Youll See An Android Logo
Tap Any Of The Buttons On Your Phone To Reveal A Secret Menu
Scroll Down To clear data/reset or clear eemcc (this might vary depending on the type of phone) and select it (try using volume up to select if it fails use the home key)
Scroll down to yes and select it.
It might take some time though
Your Phone Should Now Be Restored.
iPhone
Go to "Settings" Select "General" Scroll down to select "Reset". Here you will have various options, the main ones being:
Reset All Settings
Reset Network Settings
Erase All content and Settings
Selecting " Erase All Content and Settings" is what constitutes a Hard Reset.
Your phone will ask you to enter your passcode, and will then ask to confirm.
BlackBerry
There are 3 main ways to reset a Blackberry:
Method 1 (BlackBerry Z10 and the likes of it)
Remove the battery from the phone. You can perform a hard reset on the BlackBerry Z10 by pressing and holding the Power button on the top of the phone for about 10 seconds.
Reinsert the battery after a few seconds.
To be on the safe side, wait for up to 30 seconds and then reinsert the battery into the back of the phone.
Close the battery cover.
The BlackBerry should reboot and function normally. You
may have to power the BlackBerry back on with the Power button.
Method 2
Hold down these Keys in this order
Alt, Right Shift Key, Delete/Back Space
Method 3
Open the Options on your home screen. Performing a full factory reset, or security wipe, will remove all of your personal info and reset the phone to the state it was in when it was first turned on.
Select Security Settings. In the Security
Settings menu, select Security Wipe Choose what you want erased. Check the boxes for each of the items that you want wiped from the phone. If you want to completely erase your information, ensure that all of the boxes are checked.
Enter the code. To perform the wipe, you will need to enter the code. Type “blackberry” into the box and then select Wipe.
Wait for the phone to reboot.
Dont Forget To Add your View, Comments on this Post.
Always Like and Share Posts, You can Make use of the Share Buttons below.....
Sometimes its really painful when your device starts
malfunctioning and the last resort is to reset the
Phone.
Be careful. Resetting your phone will erase all content stored on your phone, including apps and games (along with
app data and game progress), text messages, call history, music, photos and more.
Windows Phones
To reset your phone
1. In the App list , tap Settings .
2. Tap About , then tap Reset your phone .
3. Youll receive two warnings. If youre absolutely sure you want to restore your phone to its factory settings, tap
Yes, then tap Yes again.
It might take a little while for the process to complete.
To reset an unresponsive phone:
If your phone is unresponsive and you cant reach Settings , you may be able to reset your phone using the hardware buttons. On Nokia Lumia phones (and some others), do the following to reset your phone:
1. Press and hold the Volume down and Power buttons at the same time until you feel a vibration (about 10-15 seconds).
2. When you feel the vibration, immediately press and hold the Volume down button until you see a large exclamation mark.
3. Once the exclamation mark appears, press the following four buttons in this order: Volume up , Volume down, Power , Volume down .
Your phone should now reset and restart itself. (It might take a while for the reset to finish.)
Android Phones
Each Phone Has Its restore method. The one that works for most phones.
Turn off the phone.
Hold the volume up button and power button at the same time.
Youll See An Android Logo
Tap Any Of The Buttons On Your Phone To Reveal A Secret Menu
Scroll Down To clear data/reset or clear eemcc (this might vary depending on the type of phone) and select it (try using volume up to select if it fails use the home key)
Scroll down to yes and select it.
It might take some time though
Your Phone Should Now Be Restored.
iPhone
Go to "Settings" Select "General" Scroll down to select "Reset". Here you will have various options, the main ones being:
Reset All Settings
Reset Network Settings
Erase All content and Settings
Selecting " Erase All Content and Settings" is what constitutes a Hard Reset.
Your phone will ask you to enter your passcode, and will then ask to confirm.
BlackBerry
There are 3 main ways to reset a Blackberry:
Method 1 (BlackBerry Z10 and the likes of it)
Remove the battery from the phone. You can perform a hard reset on the BlackBerry Z10 by pressing and holding the Power button on the top of the phone for about 10 seconds.
Reinsert the battery after a few seconds.
To be on the safe side, wait for up to 30 seconds and then reinsert the battery into the back of the phone.
Close the battery cover.
The BlackBerry should reboot and function normally. You
may have to power the BlackBerry back on with the Power button.
Method 2
Hold down these Keys in this order
Alt, Right Shift Key, Delete/Back Space
Method 3
Open the Options on your home screen. Performing a full factory reset, or security wipe, will remove all of your personal info and reset the phone to the state it was in when it was first turned on.
Select Security Settings. In the Security
Settings menu, select Security Wipe Choose what you want erased. Check the boxes for each of the items that you want wiped from the phone. If you want to completely erase your information, ensure that all of the boxes are checked.
Enter the code. To perform the wipe, you will need to enter the code. Type “blackberry” into the box and then select Wipe.
Wait for the phone to reboot.
Dont Forget To Add your View, Comments on this Post.
Always Like and Share Posts, You can Make use of the Share Buttons below.....
Go to link Download
Wednesday, September 7, 2016
How to Stop Flash crashing in Google Chrome
How to Stop Flash crashing in Google Chrome
Google Chrome, not at all like different programs, has its own particular variant of Adobe Flash Player constructed in. When you upgrade Chrome, it likewise overhauls the variant of Flash.
Already, the arrangement was to debilitate any additional Flash plugins, however as has been pointed out in the remarks underneath, the most recent variant of Chrome shows one and only Flash plugin. As indicated by Adobe, there was a known bug in more established forms of Chrome which "fundamentally affected Flash execution". This has been altered - to the extent Adobe is concerned - in the present form of Chrome.
This means, in case despite everything youre encountering terrible Flash execution or the plugin slamming, you ought to check in the event that you are without a doubt running the most recent variant of Chrome. In the event that a redesign is accessible you ought to introduce it. To check, click on the three even bars close to the upper right corner and snap Help and about.
Another tab will open and Chrome will check for redesigns and start downloading one if pertinent. When this is done, you will see a Relaunch Chrome buttton, which you have to snap to finish the redesign.

On the off chance that despite everything you have issues after that, the reason is doubtlessly obsolete drivers, so first check you have the most recent illustrations card drivers introduced. It can likewise be created by what Adobe alludes to as "wasteful substance", so the poor execution or slamming could be brought on by the blaze content itself. On the off chance that that is the situation, theres nothing you can do to settle it - its down to the substance supplier.
Here takes after whatever remains of our unique article which may help anybody running an old form of Chrome:
To check Google Chromes arrangement, sort about:plugins into the location bar and press Enter. This will raise a page of data about all the modules as of now arranged inside of Google Chrome.
Search for any sections in the rundown, for example, Adobe Flash Player, or Shockwave Flash. In the event that you can see two or more, you have more than one Flash module introduced.
At the upper right of the modules page youll see Subtle elements. Click this connection to uncover more data about every expansion.
The filename of every module will be recorded beside Location. Take a gander at this data, and youll see that one is put away under [Your User Folder]AppDataLocalGoogleChrome. This is Chromes coordinated module. The other will start with "C:Windows.." . The way names change contingent upon your rendition of Windows. In case youre utilizing Windows 8, for instance the way for the coordinated module is something like C:Program Files (x86)GoogleChromeApplication36.0.1985.125PepperFlashpepflashplayer.dll (the adaptation number may be distinctive).
On the off chance that both these documents offer a Disable connection, both are dynamic and liable to be the reason for your program crashes.

You can now pick which player you need to hold, by clicking Disable on the other one. Chrome will now utilize whichever variant is empowered on your PC.
In the event that you choose to utilize the installable module instead of the coordinated one, its fitting to ensure you have the most recent variant introduced. Click here to get the most recent form of Adobe Flash Player.
In the event that the smashing conduct proceeds with, have a go at backpedaling to about:plugins and selecting to utilize the other Flash player.
Already, the arrangement was to debilitate any additional Flash plugins, however as has been pointed out in the remarks underneath, the most recent variant of Chrome shows one and only Flash plugin. As indicated by Adobe, there was a known bug in more established forms of Chrome which "fundamentally affected Flash execution". This has been altered - to the extent Adobe is concerned - in the present form of Chrome.
This means, in case despite everything youre encountering terrible Flash execution or the plugin slamming, you ought to check in the event that you are without a doubt running the most recent variant of Chrome. In the event that a redesign is accessible you ought to introduce it. To check, click on the three even bars close to the upper right corner and snap Help and about.
Another tab will open and Chrome will check for redesigns and start downloading one if pertinent. When this is done, you will see a Relaunch Chrome buttton, which you have to snap to finish the redesign.
On the off chance that despite everything you have issues after that, the reason is doubtlessly obsolete drivers, so first check you have the most recent illustrations card drivers introduced. It can likewise be created by what Adobe alludes to as "wasteful substance", so the poor execution or slamming could be brought on by the blaze content itself. On the off chance that that is the situation, theres nothing you can do to settle it - its down to the substance supplier.
Here takes after whatever remains of our unique article which may help anybody running an old form of Chrome:
To check Google Chromes arrangement, sort about:plugins into the location bar and press Enter. This will raise a page of data about all the modules as of now arranged inside of Google Chrome.
Search for any sections in the rundown, for example, Adobe Flash Player, or Shockwave Flash. In the event that you can see two or more, you have more than one Flash module introduced.
At the upper right of the modules page youll see Subtle elements. Click this connection to uncover more data about every expansion.
The filename of every module will be recorded beside Location. Take a gander at this data, and youll see that one is put away under [Your User Folder]AppDataLocalGoogleChrome. This is Chromes coordinated module. The other will start with "C:Windows.." . The way names change contingent upon your rendition of Windows. In case youre utilizing Windows 8, for instance the way for the coordinated module is something like C:Program Files (x86)GoogleChromeApplication36.0.1985.125PepperFlashpepflashplayer.dll (the adaptation number may be distinctive).
On the off chance that both these documents offer a Disable connection, both are dynamic and liable to be the reason for your program crashes.
You can now pick which player you need to hold, by clicking Disable on the other one. Chrome will now utilize whichever variant is empowered on your PC.
In the event that you choose to utilize the installable module instead of the coordinated one, its fitting to ensure you have the most recent variant introduced. Click here to get the most recent form of Adobe Flash Player.
In the event that the smashing conduct proceeds with, have a go at backpedaling to about:plugins and selecting to utilize the other Flash player.
Go to link Download
Subscribe to:
Posts (Atom)