Showing posts with label like. Show all posts
Showing posts with label like. Show all posts
Thursday, November 10, 2016
How To Call Other Networks On MTN Line At The Same Rate Like MTN To MTN
How To Call Other Networks On MTN Line At The Same Rate Like MTN To MTN

Welcome to this post. On this thread am going to show you a very simple code which can be use to trick MTN Network provider to deduct the same amount they charge for MTN to MTN similar to other network when calling. The code will be adding to any other numbers you wish to call on MTN line and you will be charge like you are calling MTN-to-MTN. Though some plan/network apart from MTN Zone has the same rate when you call others network with MTN bonus and even on zone plan. MTN will charge at the same rate. That is 4kb, 8kb, 12kb, 14kb, 16kb, 20kb or 24kb. The most beauty of this tip is you can also call others network on free call.
Here Is How To Get It Done
Whenever you to call other networks with your Mtn line, just add #555 at the end of the number you wish to call.E.g. Let say you wish to call an Airtel number 08081234567.
What you have to do is to add #555 after the number.
That is to say it will look like: 08081234567#555
Then click send and you are good to enjoy same rate they charge for MTN-MTN
No more calling other networks with high or special rate, just test that simple code above and you will be surprised that it will tricked MTN network provider to deduct the same amount they charge for MTN-to-MTN similar to other network you called.
Hope this information helps?
If it works for you, dont forget to comment here and remember to share with your friends and families/like us on facebook. You can also subscribe via-email and be sure to get regular updates day by day. Have fun.
Go to link Download

Monday, October 31, 2016
How To Merge Facebook Like Box And Subscription Box Below Blog Post
How To Merge Facebook Like Box And Subscription Box Below Blog Post
Having applied Facebook comment box and subscription box on Nairotech, but Facebook like box and subscription widget seems to be quite unique & stands out due to the combination of both Facebook Like Box & Rss Subscription Box which appears at the end of every post. Helps increase the number of Facebook likes and subscribers due to the special layout.

Follow the simple steps below.
Add Facebook Like Box & Subscription Box
Go to your blogger dashboard
Click on Template > Edit HTML > Proceed (Mark Expand Widget Template)
Use ctrl F to find ]]></b:skin> & paste the following code above ]]></b:skin>
#nt-likebox{
margin:10px 10px 0 0;
overflow:hidden;
text-align:center;
float:right;
max-width:250px;
min-width:250px;
min-height:250px
}
#nt-likebox h2{
font-size:25px;
font-style:italic;font-variant:small-caps
}
#nt-likebox h6{
font-size:1.1em;
font-family:"Myriad Pro",Helvetica Neue,Helvetica,Arial,sans-serif
}
#nt-likebox div.row{
text-align:center;
margin-bottom:10px
}
#nt-likebox img{
display:inline-block;
border:none !important;
}
#nt-likebox .email{
clear:none
}
#ntfblikebox{
margin:10px 10px 0 0;
text-align:left;
float:left;
overflow:hidden
}
.emailbutton{
background:#f7f8f9;
background:-webkit-linear-gradient(top, #f7f8f9 0%, #e9e9e9 100%);
background:-moz-linear-gradient(top, #f7f8f9 0%, #e9e9e9 100%);
background:-o-linear-gradient(top, #f7f8f9 0%, #e9e9e9 100%);
background:-ms-linear-gradient(top, #f7f8f9 0%, #e9e9e9 100%);
background:linear-gradient(top, #f7f8f9 0%, #e9e9e9 100%);
filter:progid:DXImageTransform.Microsoft.gradient( startColorstr=#f7f8f9, endColorstr=#e9e9e9,GradientType=0 );
border:1px solid #ddd;
-webkit-border-radius:4px;
-moz-border-radius:4px;
border-radius:4px;
padding:6px 12px;
margin:0;
-webkit-box-shadow:0 1px 0 #f9f9f9 inset, 1px 1px 1px rgba(223,223,223,0.4);
-moz-box-shadow:0 1px 0 #f9f9f9 inset, 1px 1px 1px rgba(223,223,223,0.4);
box-shadow:0 1px 0 #f9f9f9 inset, 1px 1px 1px rgba(223,223,223,0.4);
color:#888 !important;
text-shadow:0 1px 0 #fff;
line-height:1.2;
cursor:pointer;
font-size:13px;
font-weight:bold;
text-decoration:none !important
}
.emailbutton:hover{
background:#f1f1f1;
background:-webkit-linear-gradient(top, #f1f1f1 0%, #e0e0e0 100%);
background:-moz-linear-gradient(top, #f1f1f1 0%, #e0e0e0 100%);
background:-o-linear-gradient(top, #f1f1f1 0%, #e0e0e0 100%);
background:-ms-linear-gradient(top, #f1f1f1 0%, #e0e0e0 100%);
background:linear-gradient(top, #f1f1f1 0%, #e0e0e0 100%);
filter:progid:DXImageTransform.Microsoft.gradient( startColorstr=#f1f1f1, endColorstr=#e0e0e0,GradientType=0 );text-decoration:none !important
}
.email{
clear:none
}
.email{
clear:both;
width:100%;
margin:10px 0
}
.emailform{
position:relative;
width:250px;
background:#fff;
margin:0 auto;
-webkit-box-shadow:1px 1px 2px #dfdfdf;
-moz-box-shadow:1px 1px 2px #dfdfdf;
box-shadow:1px 1px 2px #dfdfdf;
-webkit-border-radius:4px;
-moz-border-radius:4px;
border-radius:4px;border:1px solid #ddd
}
.emailinput{
width:200px;
height:18px;
margin:0 auto;
padding:8px 40px 8px 10px;
border:none;
background:none;
font-family:georgia;
font-style:italic;
font-size:14px;
color:#666
}
.emailbutton{
-webkit-border-top-right-radius:4px;
-webkit-border-bottom-right-radius:4px;
-moz-border-radius-topright:4px;
-moz-border-radius-bottomright:4px;
border-top-right-radius:4px;
border-bottom-right-radius:4px;
-webkit-border-top-left-radius:0px;
-webkit-border-bottom-left-radius:0px;
-moz-border-radius-topleft:0px;
-moz-border-radius-bottomleft:0px;
border-top-left-radius:0px;
border-bottom-left-radius:0px;
padding:9px;
position:absolute;
right:-2px;
top:-1px;
bottom:-1px;
display:block;
line-height:16px
}
.emailbutton{
padding:8px !important
}
.emailinput{
padding-right:70px !important;
width:170px !important
}
.emailform, .emailinput {
width: 245px !important;
-webkit-box-sizing:border-box;
-moz-box-sizing:border-box;
box-sizing: border-box;
height:auto;
}
margin:10px 10px 0 0;
overflow:hidden;
text-align:center;
float:right;
max-width:250px;
min-width:250px;
min-height:250px
}
#nt-likebox h2{
font-size:25px;
font-style:italic;font-variant:small-caps
}
#nt-likebox h6{
font-size:1.1em;
font-family:"Myriad Pro",Helvetica Neue,Helvetica,Arial,sans-serif
}
#nt-likebox div.row{
text-align:center;
margin-bottom:10px
}
#nt-likebox img{
display:inline-block;
border:none !important;
}
#nt-likebox .email{
clear:none
}
#ntfblikebox{
margin:10px 10px 0 0;
text-align:left;
float:left;
overflow:hidden
}
.emailbutton{
background:#f7f8f9;
background:-webkit-linear-gradient(top, #f7f8f9 0%, #e9e9e9 100%);
background:-moz-linear-gradient(top, #f7f8f9 0%, #e9e9e9 100%);
background:-o-linear-gradient(top, #f7f8f9 0%, #e9e9e9 100%);
background:-ms-linear-gradient(top, #f7f8f9 0%, #e9e9e9 100%);
background:linear-gradient(top, #f7f8f9 0%, #e9e9e9 100%);
filter:progid:DXImageTransform.Microsoft.gradient( startColorstr=#f7f8f9, endColorstr=#e9e9e9,GradientType=0 );
border:1px solid #ddd;
-webkit-border-radius:4px;
-moz-border-radius:4px;
border-radius:4px;
padding:6px 12px;
margin:0;
-webkit-box-shadow:0 1px 0 #f9f9f9 inset, 1px 1px 1px rgba(223,223,223,0.4);
-moz-box-shadow:0 1px 0 #f9f9f9 inset, 1px 1px 1px rgba(223,223,223,0.4);
box-shadow:0 1px 0 #f9f9f9 inset, 1px 1px 1px rgba(223,223,223,0.4);
color:#888 !important;
text-shadow:0 1px 0 #fff;
line-height:1.2;
cursor:pointer;
font-size:13px;
font-weight:bold;
text-decoration:none !important
}
.emailbutton:hover{
background:#f1f1f1;
background:-webkit-linear-gradient(top, #f1f1f1 0%, #e0e0e0 100%);
background:-moz-linear-gradient(top, #f1f1f1 0%, #e0e0e0 100%);
background:-o-linear-gradient(top, #f1f1f1 0%, #e0e0e0 100%);
background:-ms-linear-gradient(top, #f1f1f1 0%, #e0e0e0 100%);
background:linear-gradient(top, #f1f1f1 0%, #e0e0e0 100%);
filter:progid:DXImageTransform.Microsoft.gradient( startColorstr=#f1f1f1, endColorstr=#e0e0e0,GradientType=0 );text-decoration:none !important
}
.email{
clear:none
}
.email{
clear:both;
width:100%;
margin:10px 0
}
.emailform{
position:relative;
width:250px;
background:#fff;
margin:0 auto;
-webkit-box-shadow:1px 1px 2px #dfdfdf;
-moz-box-shadow:1px 1px 2px #dfdfdf;
box-shadow:1px 1px 2px #dfdfdf;
-webkit-border-radius:4px;
-moz-border-radius:4px;
border-radius:4px;border:1px solid #ddd
}
.emailinput{
width:200px;
height:18px;
margin:0 auto;
padding:8px 40px 8px 10px;
border:none;
background:none;
font-family:georgia;
font-style:italic;
font-size:14px;
color:#666
}
.emailbutton{
-webkit-border-top-right-radius:4px;
-webkit-border-bottom-right-radius:4px;
-moz-border-radius-topright:4px;
-moz-border-radius-bottomright:4px;
border-top-right-radius:4px;
border-bottom-right-radius:4px;
-webkit-border-top-left-radius:0px;
-webkit-border-bottom-left-radius:0px;
-moz-border-radius-topleft:0px;
-moz-border-radius-bottomleft:0px;
border-top-left-radius:0px;
border-bottom-left-radius:0px;
padding:9px;
position:absolute;
right:-2px;
top:-1px;
bottom:-1px;
display:block;
line-height:16px
}
.emailbutton{
padding:8px !important
}
.emailinput{
padding-right:70px !important;
width:170px !important
}
.emailform, .emailinput {
width: 245px !important;
-webkit-box-sizing:border-box;
-moz-box-sizing:border-box;
box-sizing: border-box;
height:auto;
}
Now, search for <div class=post-footer-line post-footer-line-1> and paste the following code
above/before it.
<b:if cond=data:blog.pageType == "item"> <div id=rbfblikebox> <iframe allowTransparency=true frameborder=0 scrolling=no src=//www.facebook.com/plugins/likebox.php?href=http%3A%2F%2Fwww.facebook.com%2Fnairotech&width=250&height=250&colorscheme=light&show_faces=true&border_color=%23e1e1e1&stream=false&header=false& style=border:none; overflow:hidden; width:250; height:250px;/> </div> <div id=rb-likebox> <h2>Do you Like this Article?</h2> <div class=row> <div class=fb-like data-href=https://www.facebook.com/nairotech data-send=true data-show-faces=false data-width=450/> </div> <div class=row> <a href=http://feeds.feedburner.com/nairaharotech target=_blank title=Suscribe to RSS feed> <img alt=rss class=middle src=http://3.bp.blogspot.com/-mOSvqawYcHk/URfqH7rzzjI/AAAAAAAADjc/33GRwq6jToU/s1600/rbrss.png/></a> <a href=http://twitter.com/nairotechblog target=_blank title=Follow us on Twitter> <img alt=twitter class=middle src=http://2.bp.blogspot.com/-_ENv9wTI9Uc/URfp_3wbONI/AAAAAAAADjU/mlzRXMHTTuE/s1600/rbtwitter.png/></a> <a href=http://www.facebook.com/nairotech target=_blank title=Become A Fan on Facebook> <img alt=facebook class=middle src=http://3.bp.blogspot.com/-ynFsVtn-uLg/URfp1LX78VI/AAAAAAAADjM/NkQ1CwyrHUw/s1600/rbfacebook.png/></a> </div> <div class=row> <h6>Get Subscribed To Free Email Updates!!</h6> </div> <div class=row> <div class=email> <form action=http://feedburner.google.com/fb/a/mailverify class=emailform method=post onsubmit=window.open('http://feedburner.google.com/fb/a/mailverify?uri=Nairaharotech', 'popupwindow', 'scrollbars=yes,width=550,height=520');return true target=popupwindow> <input name=uri type=hidden value=Nairaharotech/> <input name=loc type=hidden value=en_US/> <input class=emailinput name=email onblur=if (this.value == "") {this.value = "Enter your email...";} onfocus=if (this.value == "Enter your email...") {this.value = ""} type=text value=Enter your email.../> <input class=emailbutton title= type=submit value=SignUp/> </form> </div> </div> <div class=row> <small>*Your email is safe with us!</small> </div> </div> </b:if>
Any contribution is welcome, and feel free to share this useful post using the share buttons.
Go to link Download
Friday, October 14, 2016
How To Download Install App World On Blackberry Devices like 8520 8900 9900 BB10
How To Download Install App World On Blackberry Devices like 8520 8900 9900 BB10
First and foremost, let me clarify that theblackberry app world has been changed to Blackberry World. Just in case you are looking forward to downloading and installing app world and you end up seeing blackberry world.
Ordinarily, the app world AKAblackberry world, comes pre-installed on blackberry smartphones and devices. Irrespective of the fact that you are using a blackberry Curve 2, curve 3, curve 4, bold 2, bold 3, bold 4, bold 5 (9900 and 9930), Q5, Q10, Z10 etc (as long as it runs on OS v5.0 upwards), blackberry world comes pre-installed on the device.

But for diverse reasons, you may encounter issues with using the pre-installed app and the only option left for you will probably be to delete the pre-installed and download another app. Or you have issues updating the app and the next option is to download the latest version of the app, this post is to aid you on that.
Download and Install App World On Your Blackberry Smartphone Devices
The simplest way to do this and to make sure you are downloading the latest version is to visitwww.blackberry.com/appworld/download.
When the page opens fully, click ondownload and your download should start.
If you are having problems with downloading or installing the app world (Blackberry World) application on your blackberry device, do let us know via comments.
Go to link Download
Friday, October 7, 2016
How To Make Your Windows XP 7 Server 2003 2008 Look Like Windows 10 With The Latest Transformation Pack
How To Make Your Windows XP 7 Server 2003 2008 Look Like Windows 10 With The Latest Transformation Pack
Windows 10 is all the rage these days. For those who are excited about Windows 10?s aesthetics, a Windows 10 Transformation UX Theme Pack has been released and shall dress your Windows XP, Vista, 7, 8, and 8.1 in all the makeup required to walk the Windows 10 ramp.
There are a number of Windows 10 transformation packs out there but ‘UX’ pack is this package’s ability to make changes to your Windows installation without patching the system files, making the transformation pack less likely to cause system issues.

This new Windows 10 Transformation/UX Pack carry the same installation procedure be it on Windows XP or Windows 8.1. As with most transformation packs, this one takes you through the setup allowing you to choose the customizations you want made to your existing Windows, but if that confuses you, you can always go the default way, which should be fine for most novice users.
The setup integrates new themes, wallpapers, icons, fonts, sounds etc. along with various third party tools to emulate certain looks and functions of Windows 10, such as the new Start Menu. You might think that it’s the same that is to be found on previous version of Windows, but in reality it is the new Windows 10 Start Menu with tiles which gives Windows 8 and 8.1 users a good chance to experience the new look and feel of the OS without actually installing it.

Windows 10 is currently available as a Technical Preview build for testing purposes only. If downloading and installing the Technical Preview is too much of a work for you, you can take the easier approach by downloading the transformation pack here , something that you can easily remove later.
Go to link Download
Saturday, October 1, 2016
How A 5MB Hard Disk Looked Like In 1956
How A 5MB Hard Disk Looked Like In 1956
It’s amazing how far the world has gone with tech and most especially with miniaturization of gadgets. The pictures below are pictures of a 5 MB hard drive being shipped out by IBM in 1956.

In September 1956, IBM launched the 305 RAMAC, dubbed as the world’s first SUPER computer with a hard disk drive (HDD). The HDD weighed over a ton and stored 5 MB of data. You can see how many men it’s taking to load it unto a vehicle.


See the same hard disk drive as it’s loaded on a plane.
Go to link Download
Monday, September 19, 2016
How many Nigerians will do this And how many helpers like this we have in Nigeria
How many Nigerians will do this And how many helpers like this we have in Nigeria

just like what this man did to the poor girl lJN Amen.
Go to link Download
Saturday, September 17, 2016
How to Increase Facebook likes with Facebook Popup like Box
How to Increase Facebook likes with Facebook Popup like Box
Facebook is a popular social media which is source of entertainment as well as earning.As facebook is source of to promote business.You create facebook fan pages,like pages to promote your business or get followers on your website. Most easiest way to get high likes for facebook is to add Facebook Page Promoter popup like box on blog or website. Popup like box enable you to get followers for your website. To add facebook page like box, you do not need to understand a complex chemistry, just by some simple and easy steps you get like box on website. So follow given below simple and easy steps to Increase Facebook likes with Facebook Popup like Box.
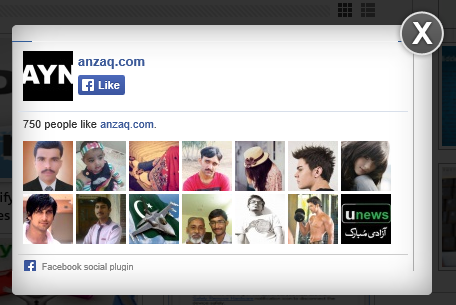
How to add Facebook Pop Up Like Box in Blogger:
1. Go to blogger.com
2. Go to dashboard>>layout>>add a gadget>>HTML Java script.
3. Copy and paste below code in HTML Java script box
4. Change the "anzaqpage" with your facebook fan page username.
5. Set Facebook like box display time simply change this "10" from the code above.If you set 10 its mean after 10 sec facebook pop up like box will appear on your blog/website/
Click Save and you are all done!
Go to link Download
Monday, September 5, 2016
How to Install Whatsapp on s40 Java Phones Like Nokia X3 00 and X2 00
How to Install Whatsapp on s40 Java Phones Like Nokia X3 00 and X2 00
This tutorial will guide you to install Whatsapp messenger on your non-supported java phones like the Nokia X3-00,X2-00 and any other non-supported java phones.

Please take note you need to free up your internal memory before proceeding, at least have more than 4MB free and very important to have two SIM card in the phone while installing it and setting it up so you dont have setting up favorites failed.
1. Download the Raw file from here note the file is a zipped file.
2. unzip the downloaded zipped file, then copy the whole folder to your memory card (advisable to do this step on a computer).
3. Now goto the folder, DO NOT launch the whatsapp application inside the folder just yet.
4. Copy the application from the memory card to your My Apps or Games.
5. Now go back to the initial folder and delete it.
6. Now go to the whatsapp application in your phone, click the option button and click update version, let it update then you can open the application…follow all instructions and be patient, when it is finally opening, you will get updating notification enabler let it load, it will fail and tell you phone not supported, close it and your whatsapp is installed and working.
Update: for those asking how to get the unzipped version download this two files here and here , copy them to a folder on your memory card, then rename them like this WhatsApp_jar will now be WhatsApp.jar then WhatsApp_jad will be WhatsApp.jar after this follow the steps from 4. above.
For People still not able to install Whatsapp both the zipped and unzipped, i still have a solution for you just download directly from Nokia store here and it will surely work,
You can now watch the video tutorial i made on Youtube, click the above video and watch the part 1 and 2.
A suggestion for people in india who are getting error on updating favorites should follow this steps:
Step 1 : You need to get a Nokia phone that has whatsapp messenger working on it already.
Step 2: Copy the application to the phone’s memory card (Note:copy not cut)
Step 3 : Remove the memory card and insert into your mobile phone copy the whatsapp to your phone.
Step 3 : Remove the memory card and insert into your mobile phone copy the whatsapp to your phone.
Now start enjoying whatsapp on your Nokia Nokia X3-00 and X2-00 thanks to Ashmin for pointing out the method
also if you are getting Setting up favorites failed. Network Conditions do not allow contact refresh then just delete your all configurations of gprs from Menu->Settings->Configuration->delete configurations…then again open your whatsapp application from memory card
some brilliant suggestions by our readers which could help you:
1. If you are getting error do a factory reset on your Nokia Nokia X3-00 and X2-00…then open your browser and update the new Nokia xpress. close and start the whole process again.
2. make sure you have two SIM CARDS in the phone while doing this process, but you will be needing just one to access the internet but the second SIM card slot should NOT be empty.
Go to link Download
Subscribe to:
Posts (Atom)